
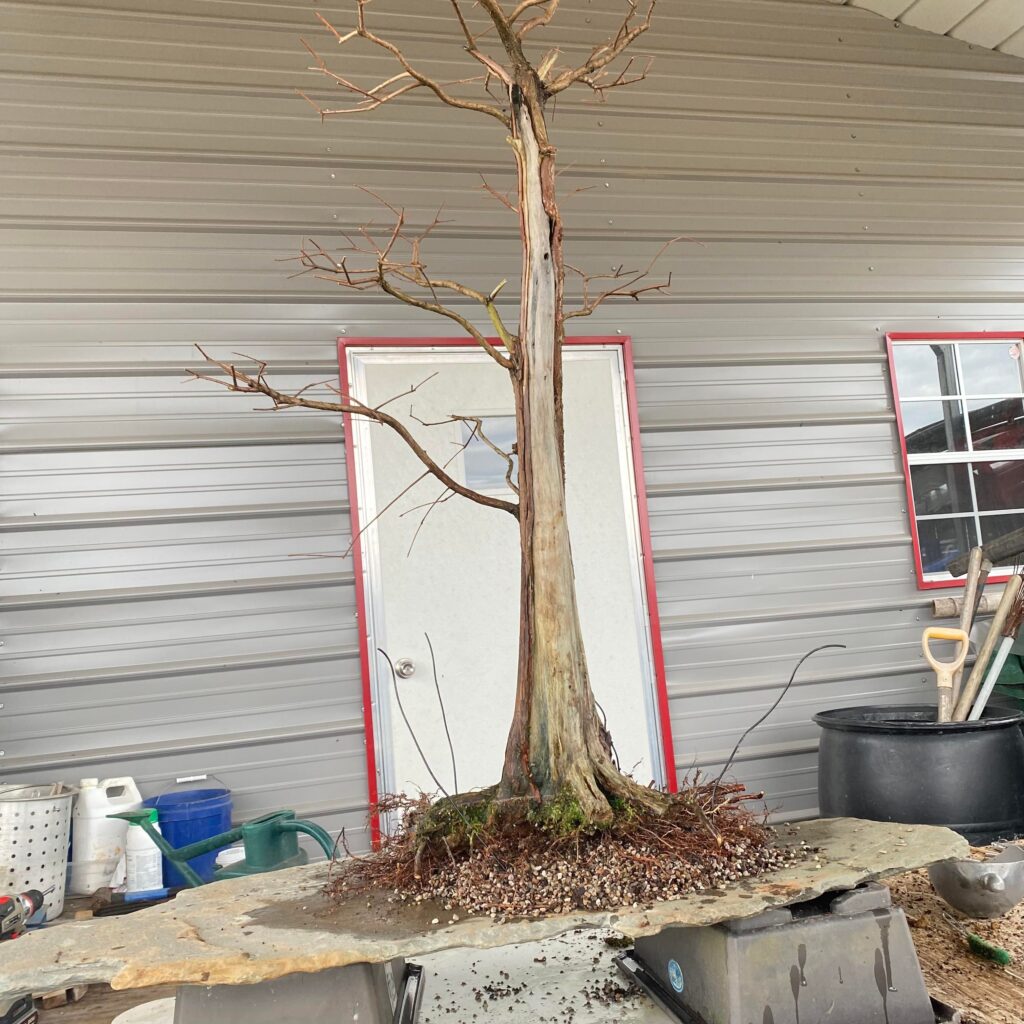
It’s time to revisit a tree I’ve been developing for a couple of years now and I have been really looking forward to this moment. In this post, I will be going over the step by step process of planting a tall, slender flattop bald cypress onto a landscape stone.
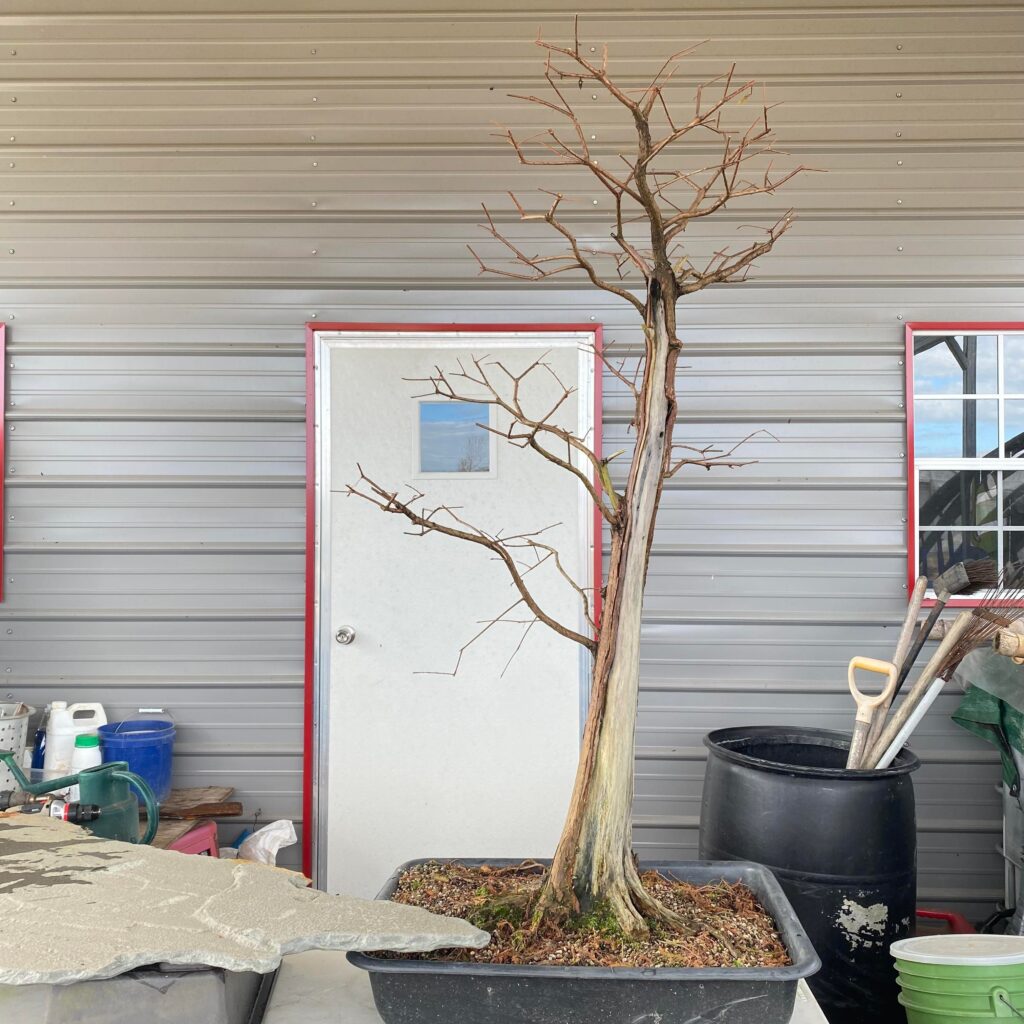
A brief story of this tree to began with. It was collected by Nate Murray, The Boot Bonsai, in January of 2020. The tree was allowed to recover in the back grow field in the mortar tube you see it in in the photo above. Unfortunately, the tree’s roots that were previously submerged in water for the majority of its life were over exposed to direct sunlight. The bark of the tree was not adapted to deal with the heat and the trunk and roots sunburned.
I know it sounds a little funny to say and you’re probably wondering if there is tree sunblock available at garden centers now. There is no such product so if you’re worried about your bald cypress roots burning the best defense is actually quite simple. Lay a wet towel over the roots during the hottest times of the year and rotate weaken roots away from direct sunlight. Cheap white painter’s towels from the hardware store do the trick and you can discard them afterwards because they will get a little mildewy and moldy.
I pulled a good ol’ Bob Ross and treated the mistake of aftercare as a happy mistake. The result is a happy tree that I’m quite fond of the design now.
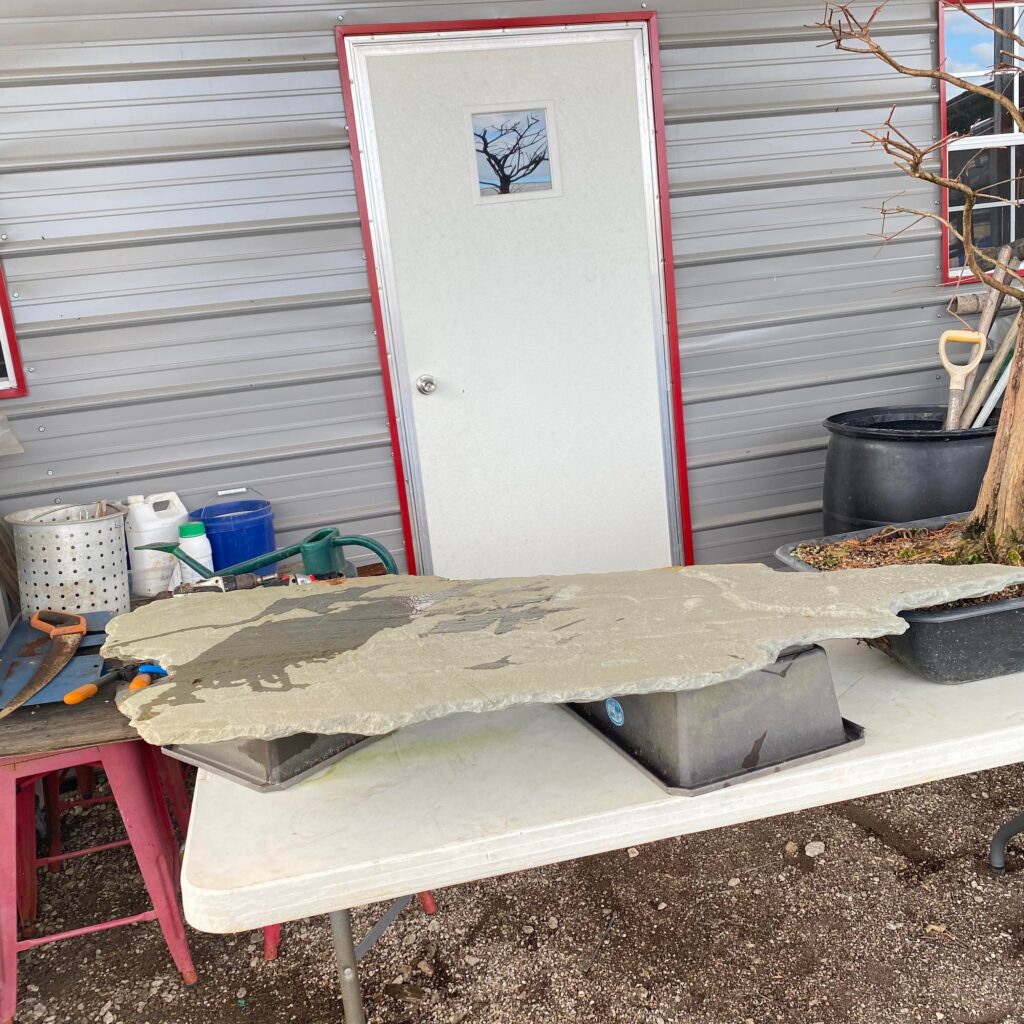
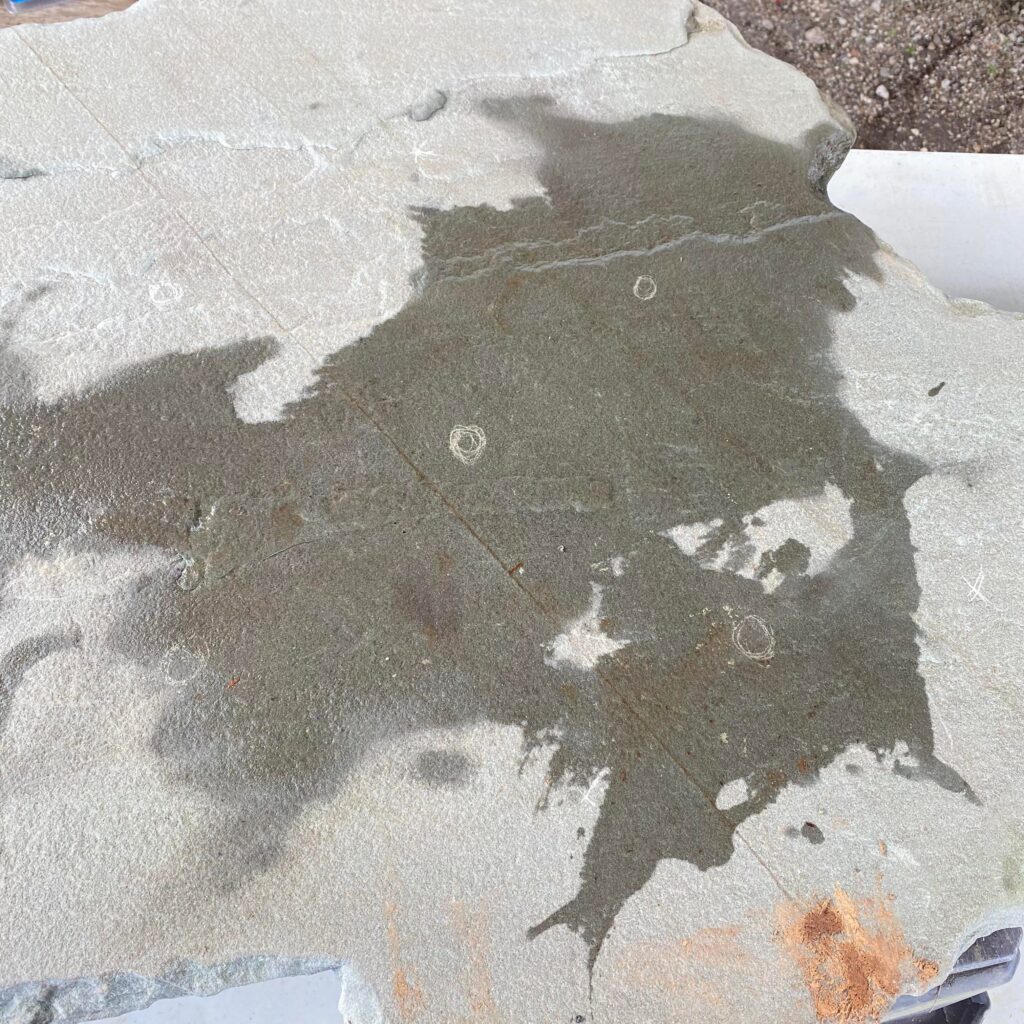
This is the Colorado Blue stone I will be going with for the planting. This stone was carved and shaped by Bill Butler of Bill’s Bayou. I told him what I was dreaming up and he did an excellent job shaping the slab to a complementary shape to fit the tree.
There’s a couple of things I will say about stone slab plantings before I get too far into the process here. Traditionally stone slabs like this are used for multi tree forest plantings. Also, stone is used in conjunction with species of trees that are native to areas that have mountains and rocky hills in their environments. My bald cypress here is styled in a form that suggests marsh and southern wetlands where stone would never be found. So why am I going against the grain, no pun intended, with this planting? Well, I’m intending on using the stone to represent water and really stretch out proportions of the overall composition. The swamps I am familiar with are low and very flat. The water is murky, opaque, and placid. I find this stone mirrors the native estuary these flattop bald cypress exist in pretty well.
Also, I really haven’t seen a planting quite like it before. So why not give it a go.
I chose to flip the slab over and turn the point going the other direction. I want there to be a lot of tension in the composition. This tree is supposed to represent the struggle of the brackish water intrusion.
The eroding of the coast Louisiana coast is causing a lot of salt water to bleed over into the water ways. Further and further inland trees like this can be seen, more and more they will slowly die in years to come. Flattop bald cypresses are not at their height of health. Bald cypress have to be the tallest tree in their environment to fight for sunlight so they grow wide solar panel tops and shed their lower branches as time goes on. They are a fresh water tree so the invading salt water eats them alive and cause them to become very sparse. The strength and vigor of bald cypress is very high and they fight to grow each year. They attempt to tap into deeper wells of fresh water below the murky bottom of the once river bed they thrived in. It’s a sad story but it is a story I feel like should be told. They are one of the most beautiful trees in North America and a big part of our bonsai culture here in Louisiana.
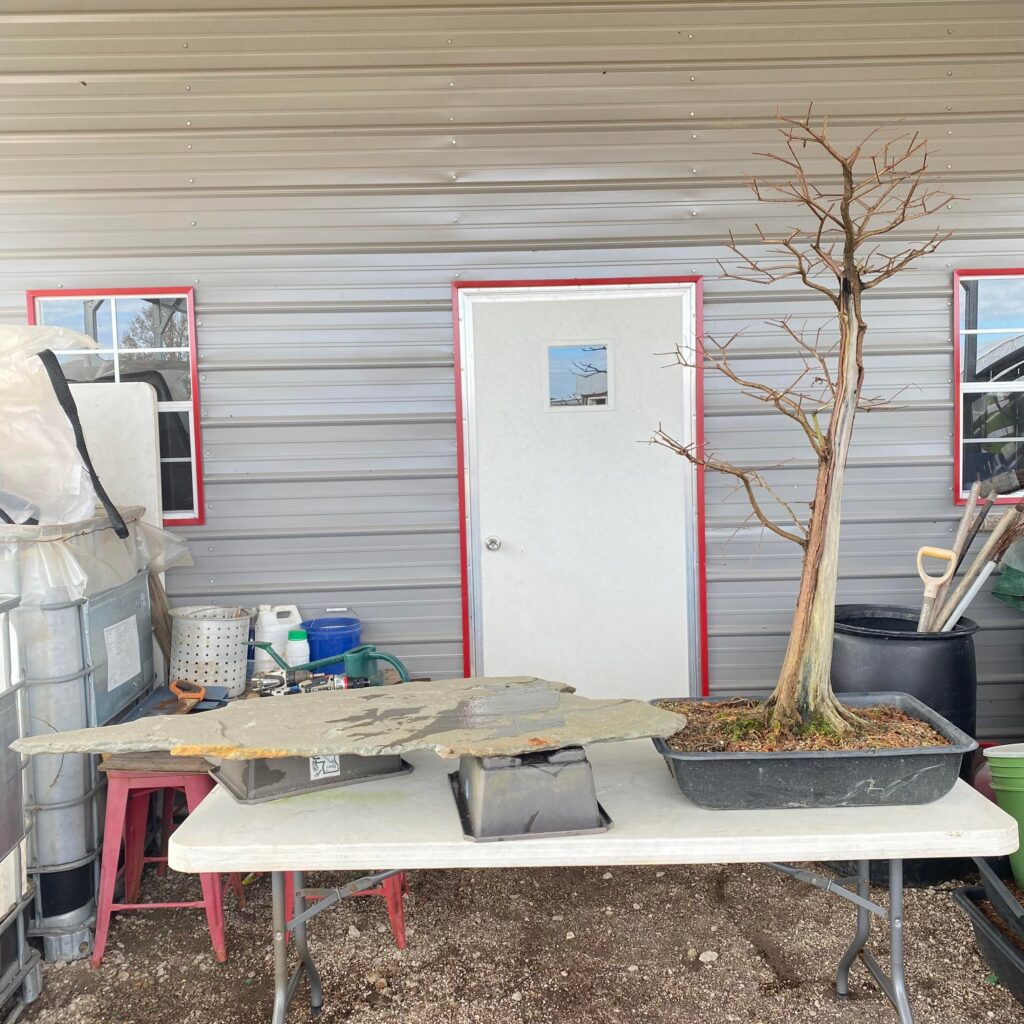
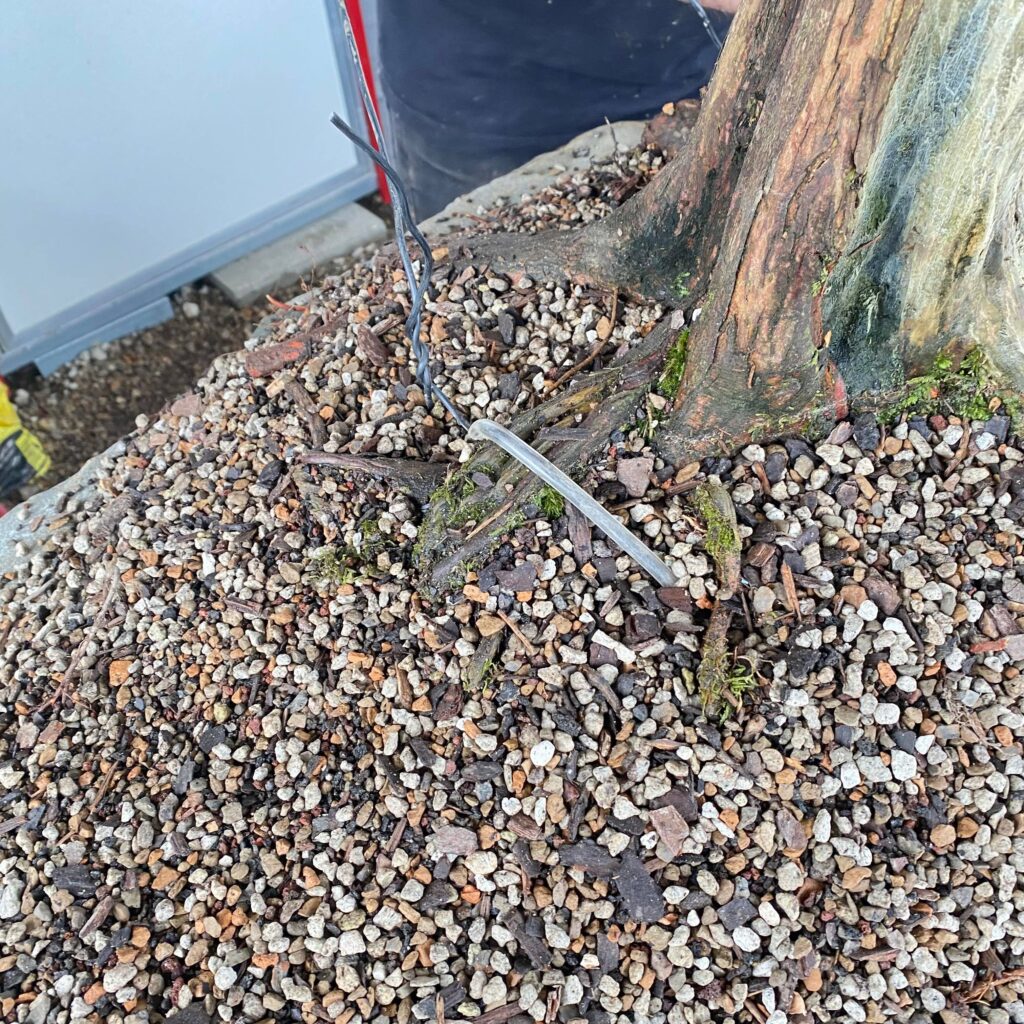
The tree was leaning a little far back so I angled it slightly more to center. I want my tree to feel strong and tall not falling over.
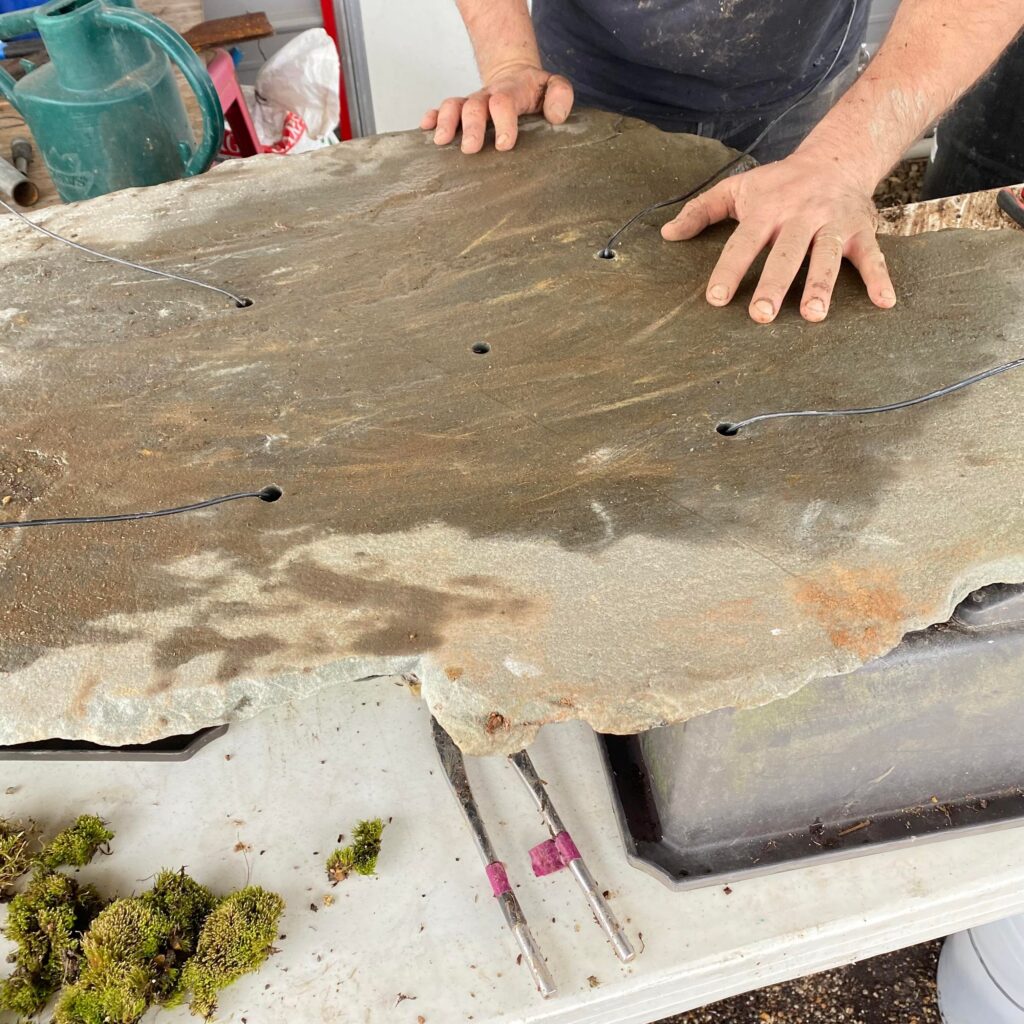
After several minutes of stepping back and squinting my eyes to see if everything looks right I choose the locations of the holes in the slab. I will need to drill these holes so I can properly mount the tree to the stone without fear of it getting blow over by the wind. Also, this will be a very swallow planting so I will need the wires to help me stabilize the tree while it is recovering. Believe it or not but the bald cypress can and will grow enough roots to stand on the flat stone by itself.
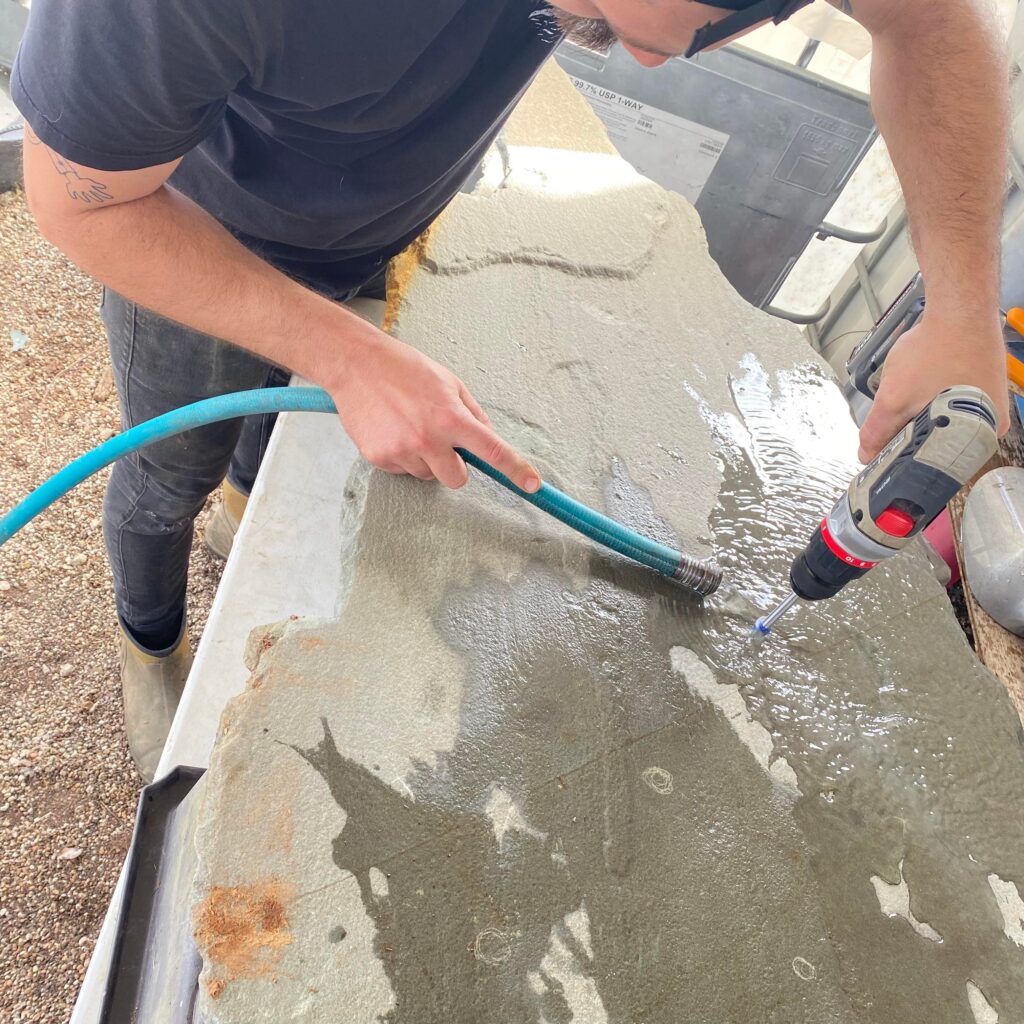
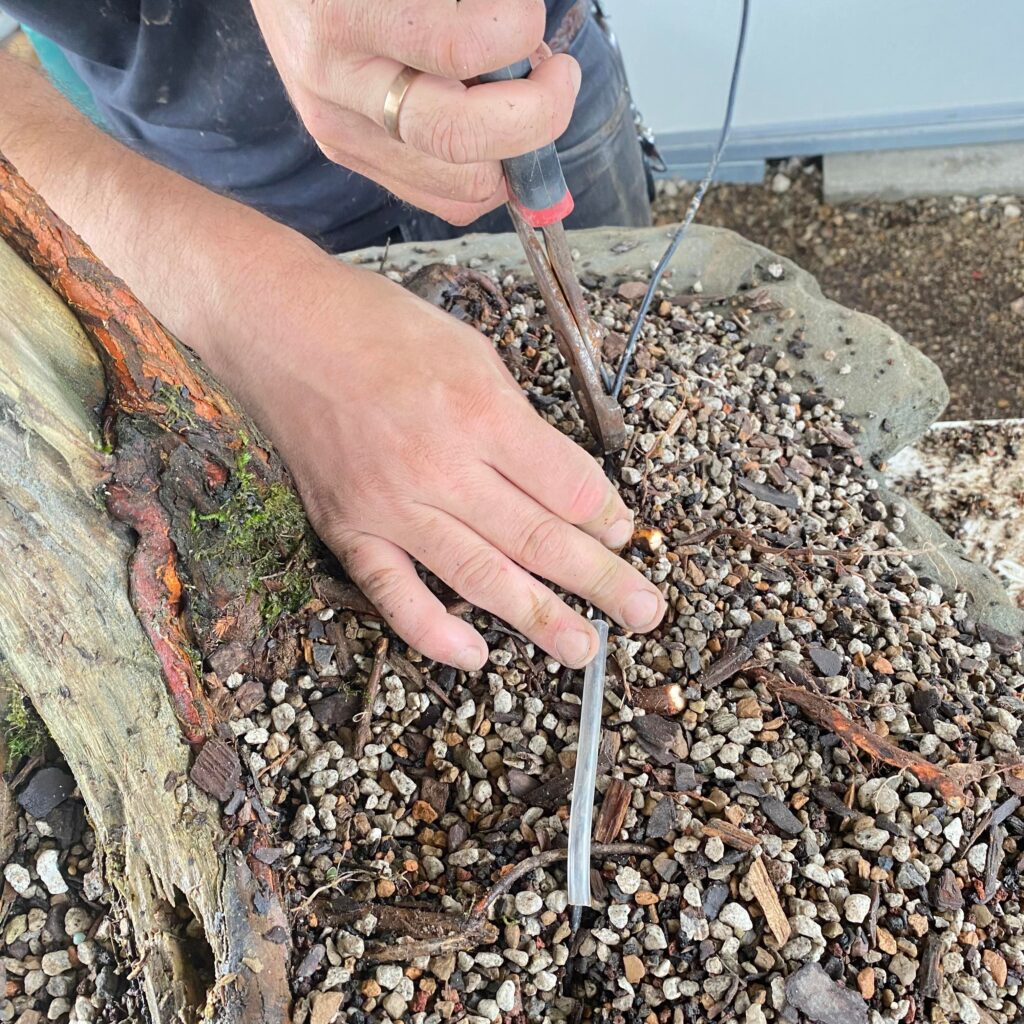
To drill the holes I used a masonry bit and a stream of water. Running water over the hole while drilling simultaneously cools the bit off as it pernitrates. If the bit becomes too hot while working it can cause a lot of friction. This could result in cracking the stone or dulling the bit. The stone was pretty thick in a few sections I drilled and this took some time. Yes, the cordless drill battery died but after a quick recharge we got the job done.
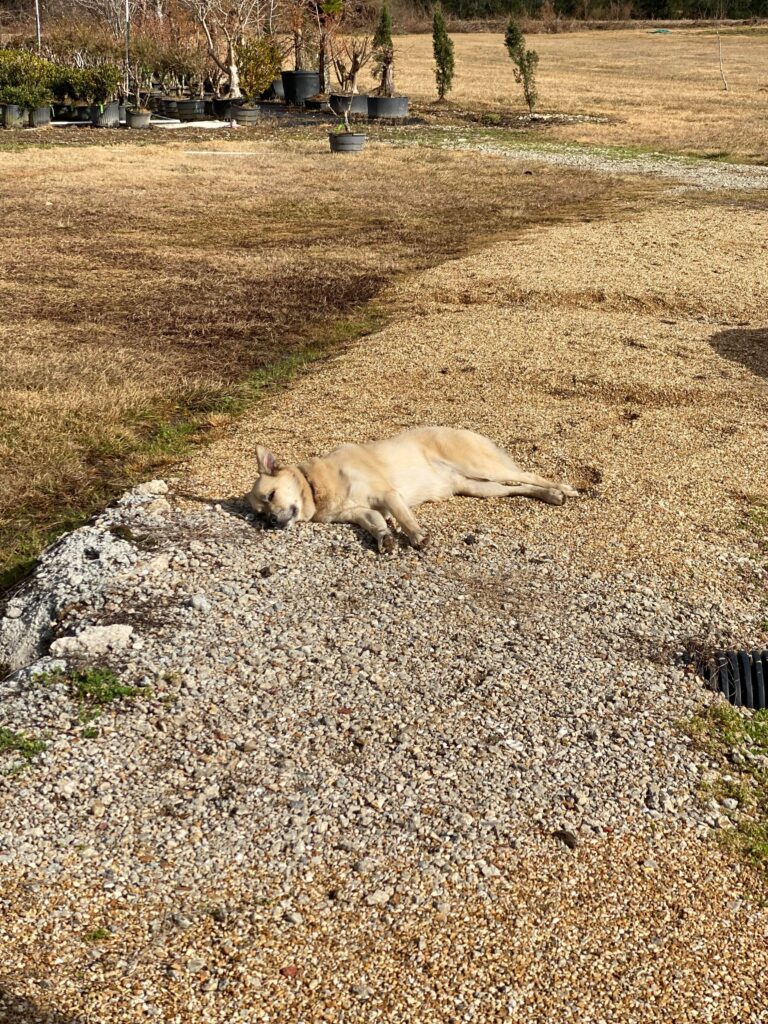
The process of drilling out the holes took so long our “Branch” manager had to take a nap in the warm sunlight.
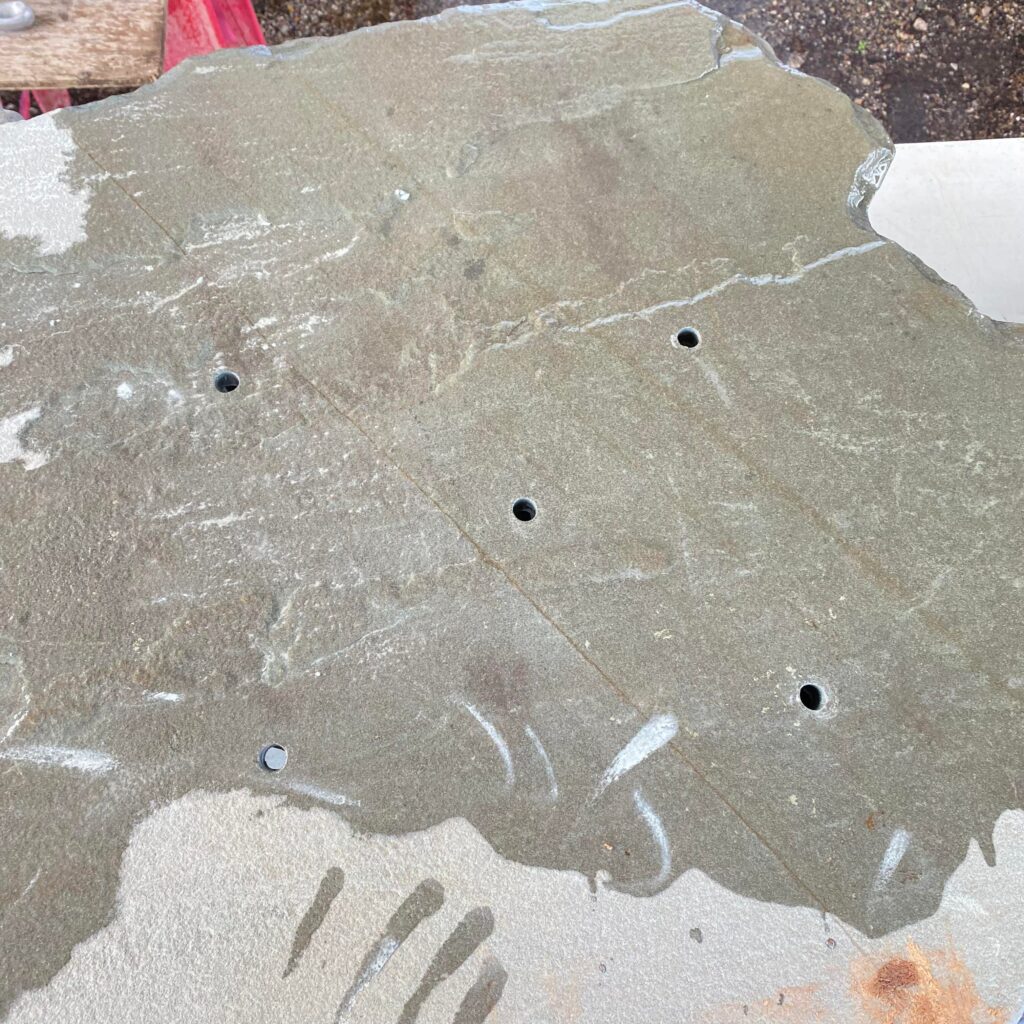
Five holes. Two on each side for one wire to pass through and one in the center for drainage. The center hole could be a plan B if the roots of the tree do not work out the way I’m intending them to.
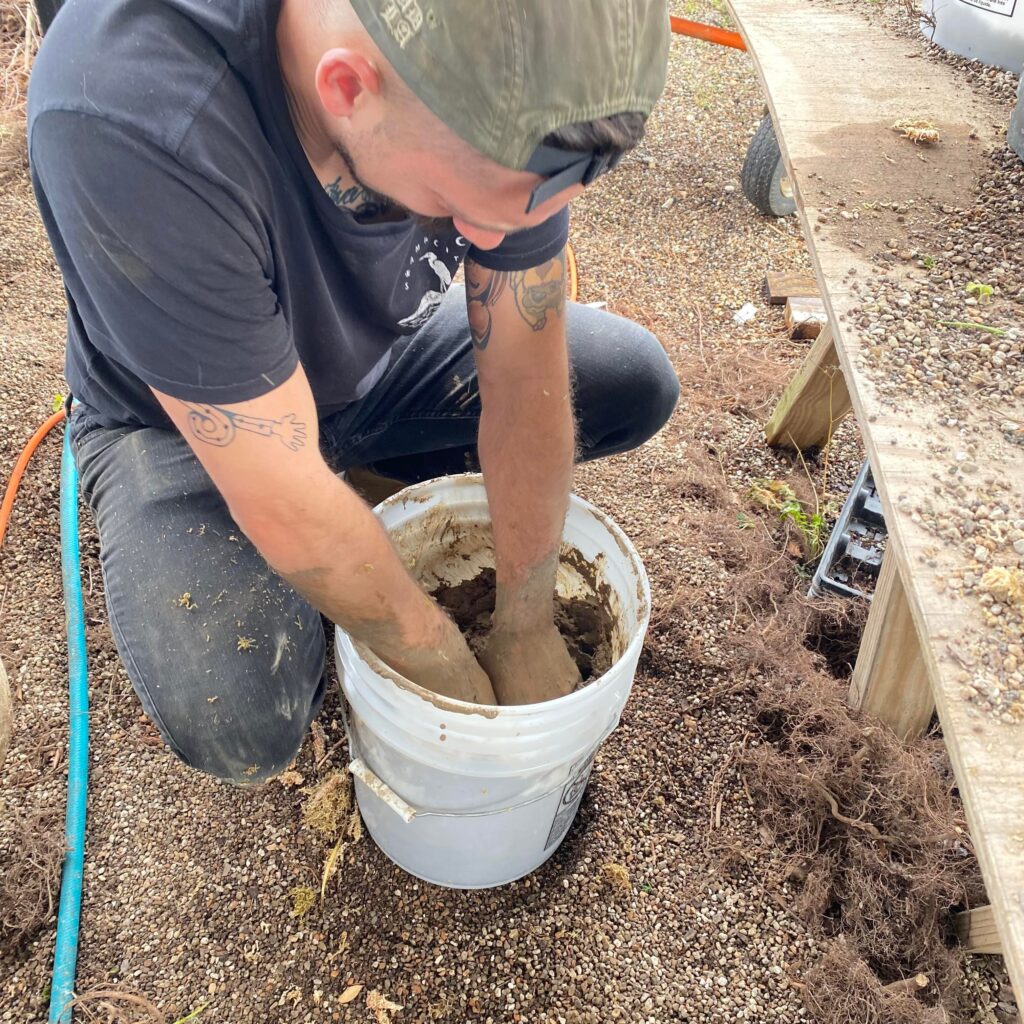
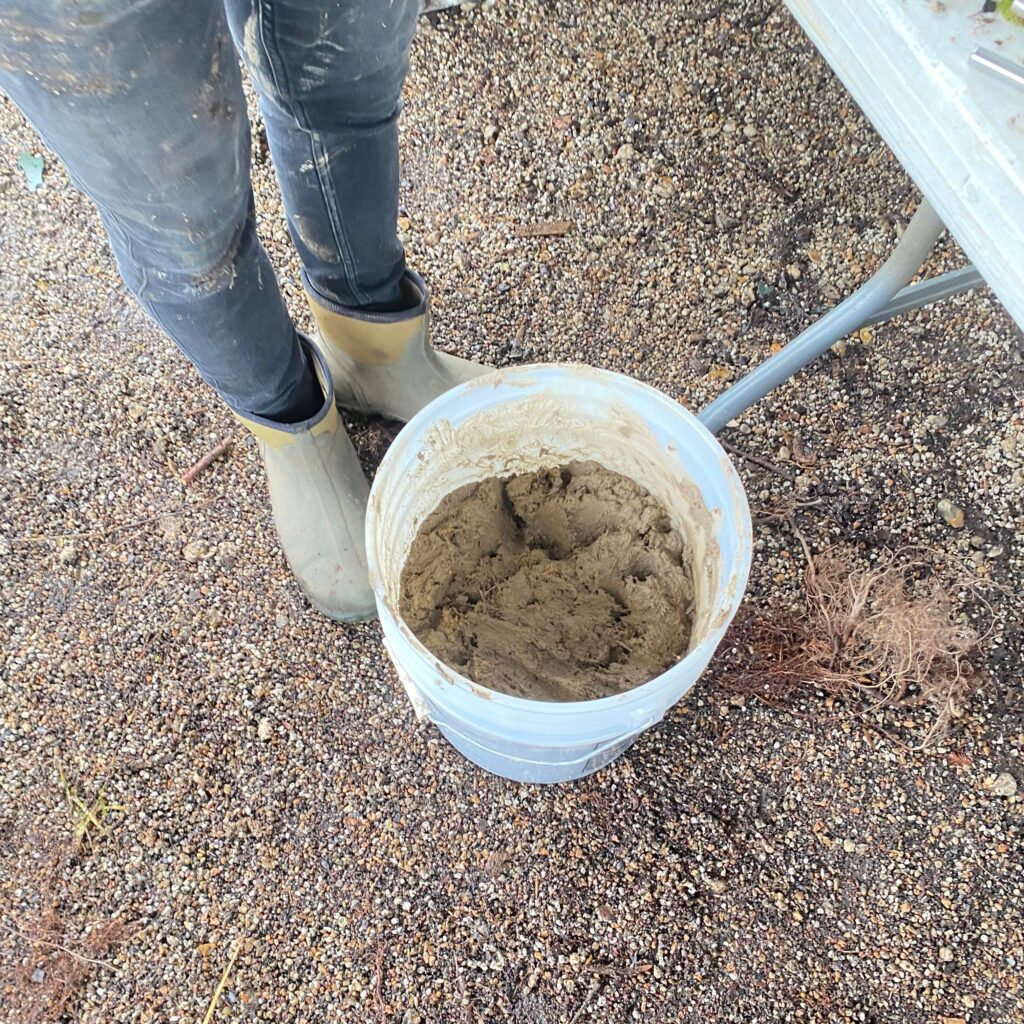
The very next thing I did was prep the “muck” for the planting. I will not start working the roots of the tree until I’m completely prepped. I gathered up more then enough clay for this planting.
If anyone is interested in what I use for my muck mix:
-2 parts crawfish mound
-1 part long stranded sphagnum moss
-A touch of akadam dust for color
Mix it all together until firm yet creamy. The best case scenario is that the muck will stick to the sides of the bucket without sliding down. I can do an entire post on why I use crawfish mounds or “chimneys” later on.
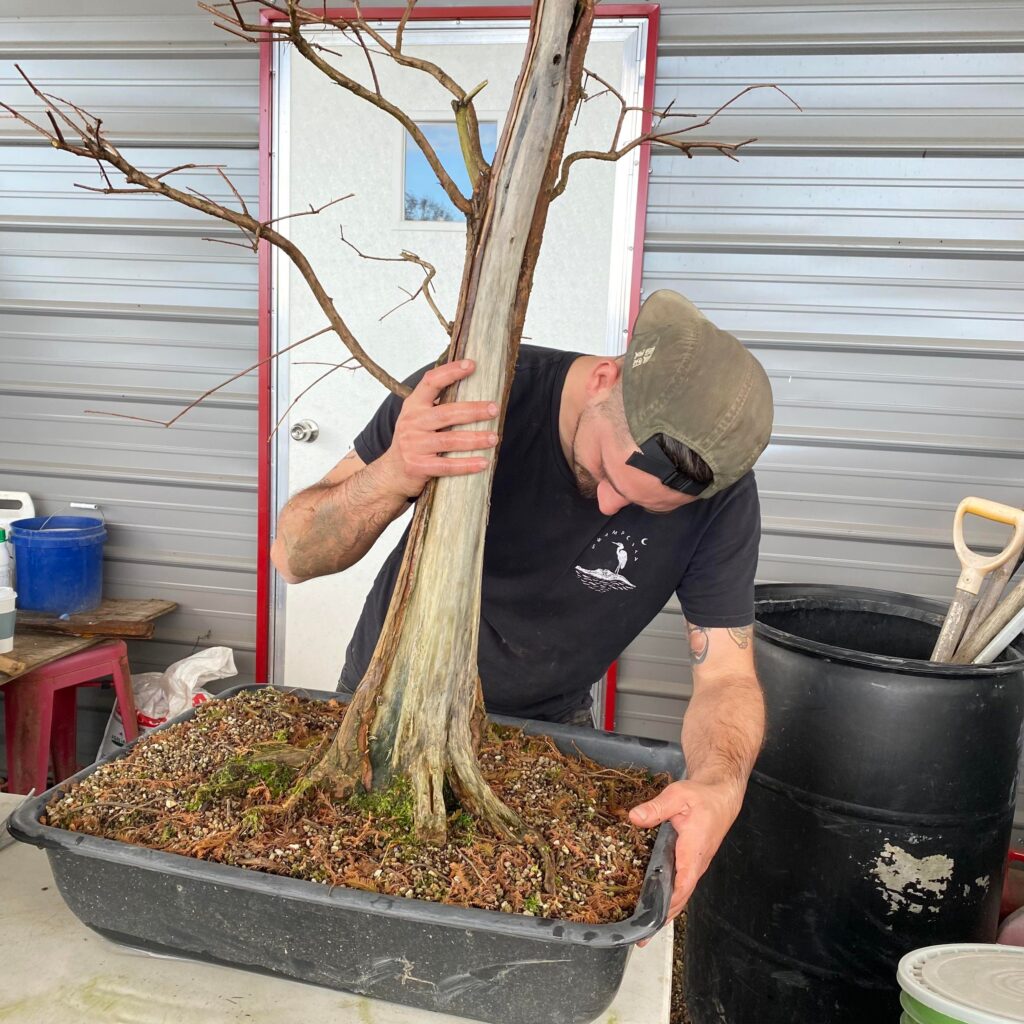
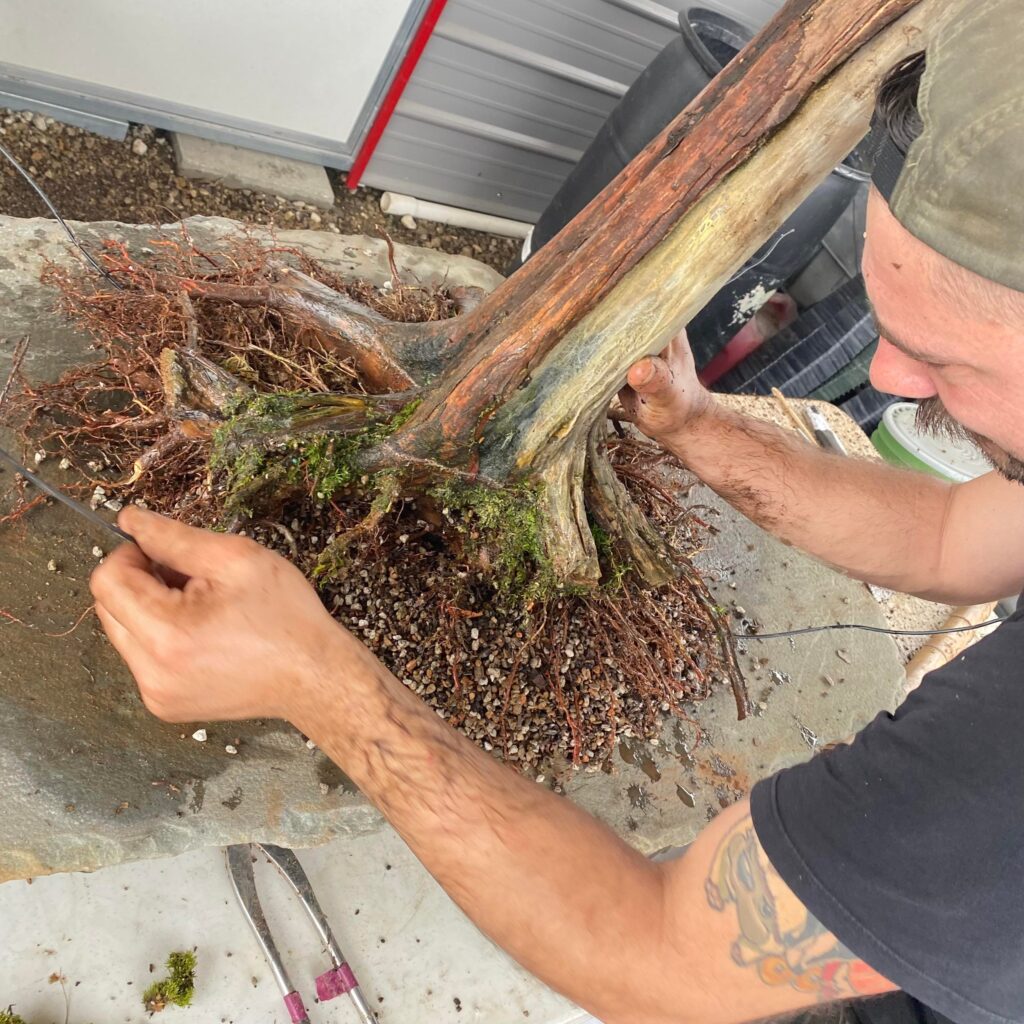
I’m testing the roots here. This is not to make you think I’m going to rip this tree out of the mortar tub by pulling on the trunk.
Rocking the tree back and forth gently to see how developed the roots are is how I go about it. I think the majority of the thicker roots will be on the backside of the tree away from the large deadwood section. Or one would assume.
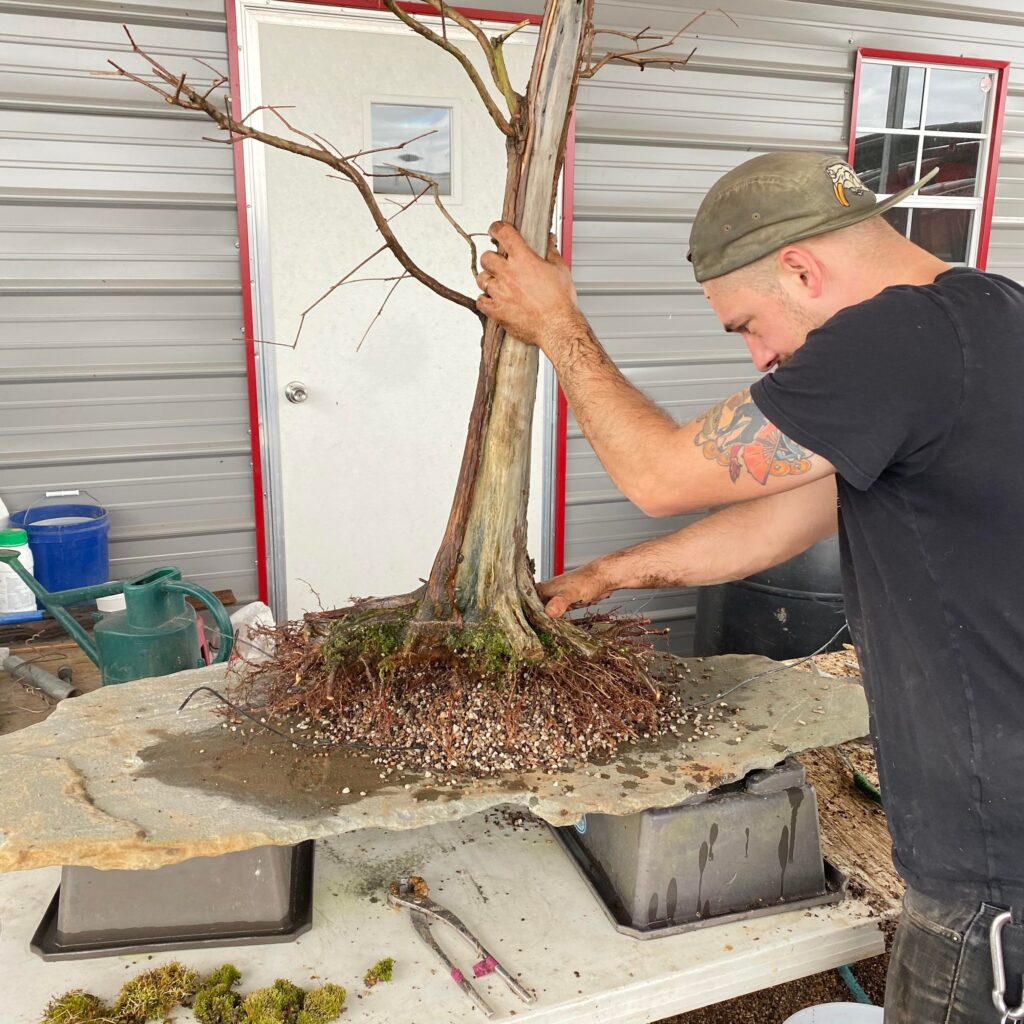
So it turns out I was wrong about the roots but not in a bad way. The root system was much denser then I had assumed. This tree has grown exponentially this past year. In fact, the deadwood section had a hand full of roots that had developed on slivers of live wood.
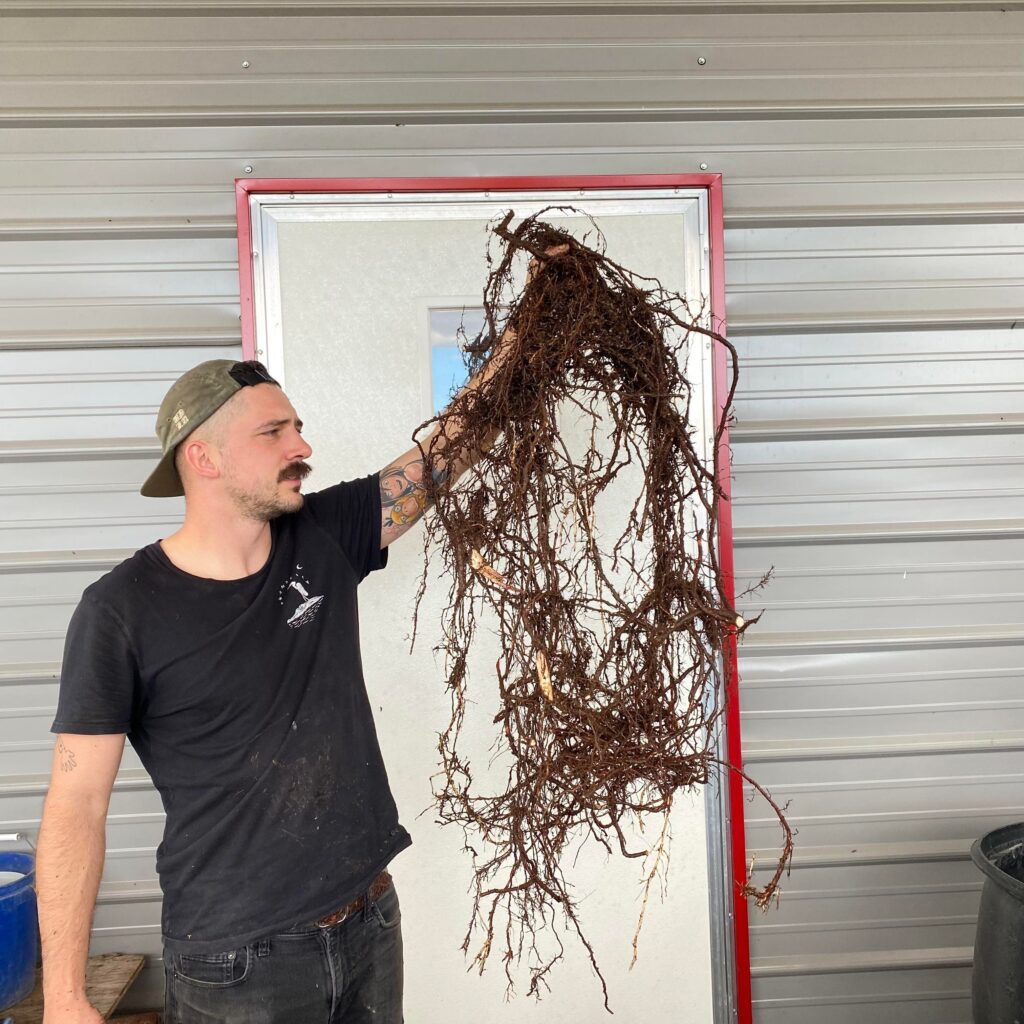
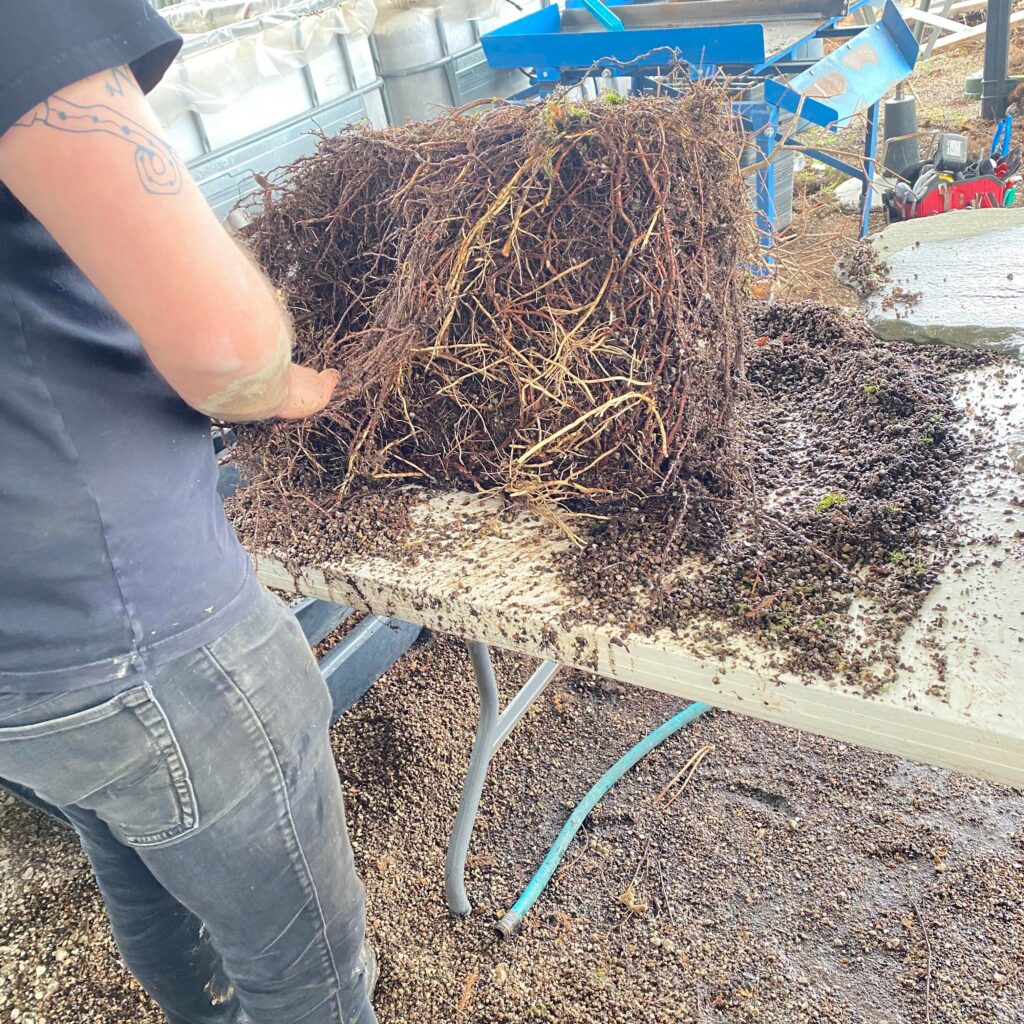
Behold! The stringy long running roots off the matted exterior of the root system. Surprisingly, I did not have to remove too many roots to work the tree down onto the slab the way I was imagining. The chunk of roots I’m holding here actually all came from one point. This shows how crazy bald cypress get when they put on new roots. The only issue I had with getting the tree to sit flat on the stone was a bit of the tap root that was left behind during collection. It’s best to cut the tap roots up into the base of the roots as far as possible. More on that technique in a later post as well.
Making sure the wire is the correct gauge and secure in the stone. The tree has plenty of roots all the way around so we can use a basket tie down method for the best hold.
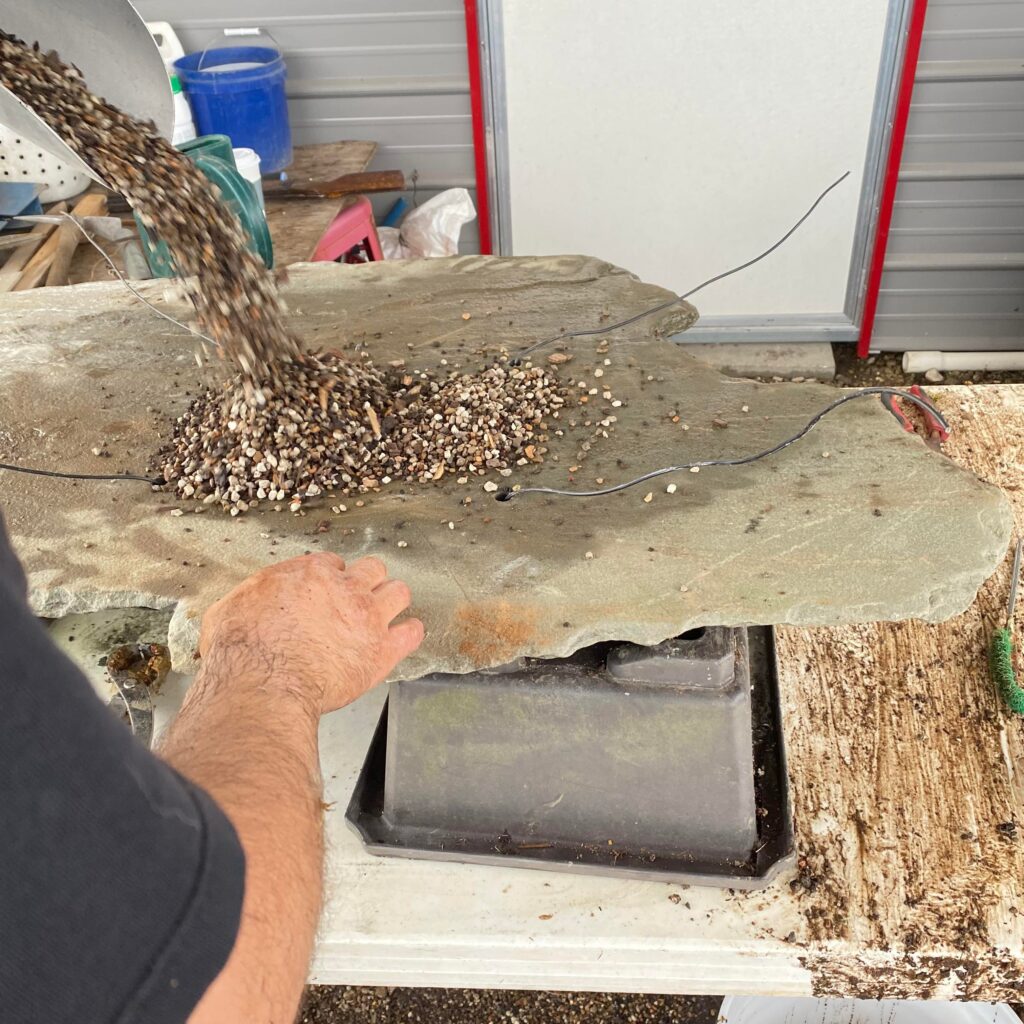
The next thing to do is pour the soil directly on the slab and make a mound for the tree to straddle. I do not need a “drainage” layer of soil here. Bald cypress are water loving trees and drink up water very efficiently. Even if there is a spot in the roots that holds too much water the tree will slurp it right up. Conifers, like junipers and pines, need drainage layers to help prevent clogging and root rot. Bald cypress is a deciduous conifer that is an entirely different kind of beast.
My mound of soil is more like a cone. This is to ensure that soil gets into all the tight spots that I will not be able to chop stick in.
The tree is rocked back and forth on the cone then twisted slightly. I will do this until I get the tree nice and flat to the stone. I’m aiming for right under two inches of soil surface so I will have to push it down pretty low.
This is me working the wire around the delicate roots so they do not get crushed in the wiring down process. I’m looking to take full advantage of the thick surface roots for anchoring the tree.
At this time I need to step back and make all the adjustments to the angle and front before the final tie down is done. Everything seems to be working out. The tree is standing fairly well on its own. Also helps that it was not very windy outside.
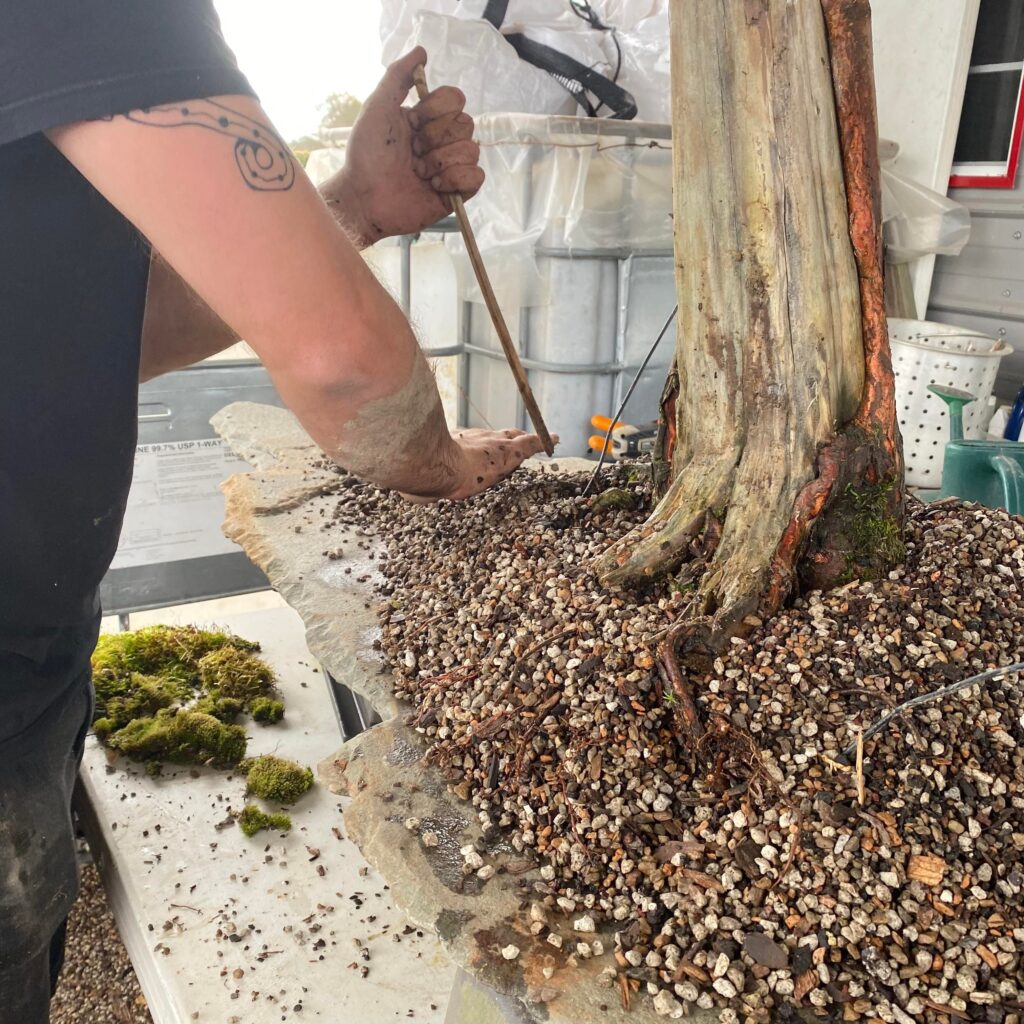
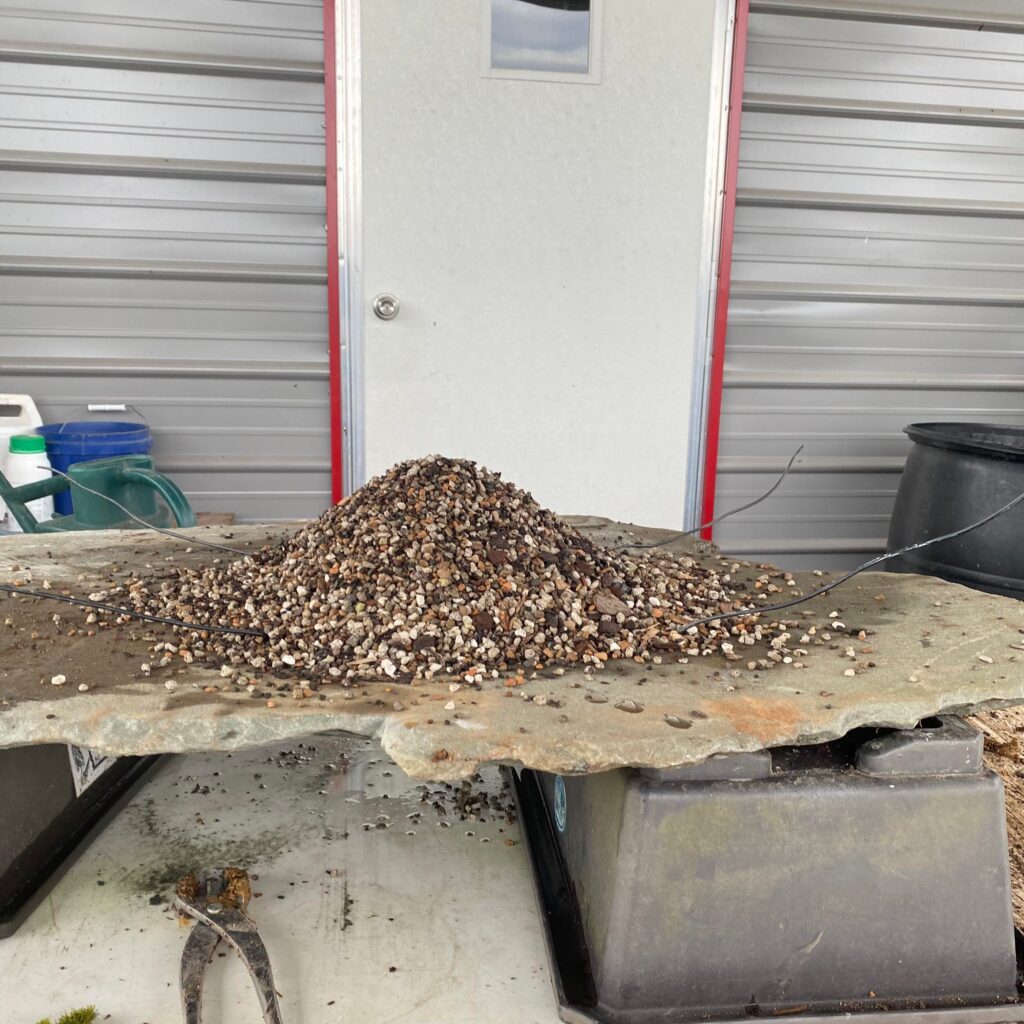
Now I get to chop stick in the rest of the soil and form the shape of the landscape. I want the tree to look like it’s on a small raise from the river with lots of negative space around the tree. This will help the viewer paint the picture in their mind of the flat lands around the tree. I hope it suggests the near desolate and once was swampland the tree exists in.
I’m using the length of the stone to draw out the lines and distance of the planting. This will help create an illusion where the planting looks shallower then it really is. Eventually the tree will fill the soil with roots as well. The more space I can make for the tree to grow fresh roots into the better.

I’m using surgical tubing for tying down the tree. This tubing will help create a rounder surface area for the wire so it will not cut into the surface roots as easily. I will still have to watch the wire closely as the roots develop though.
First of a couple spots I used the tubing.
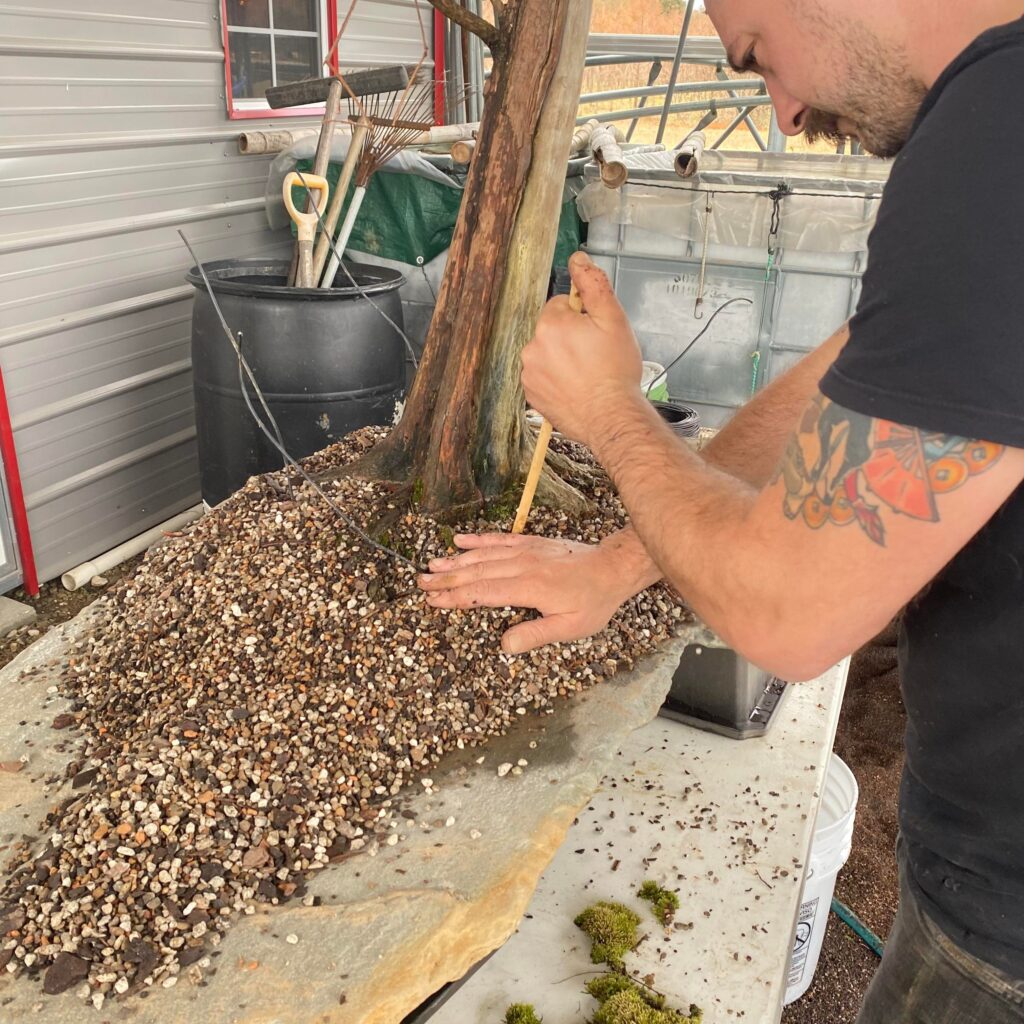
Pull up and twist to take the slack out of the wire. I want a nice firm hold on the tree. This will compress the tree even closer to the stone and close up any air gaps.
Time for building up the muck wall. The muck is easy to work with and it is much like clay you would use for making pottery. It was pointed out to me by Gavin that you can wet your hands to help with the clay sticking to your hands during application.
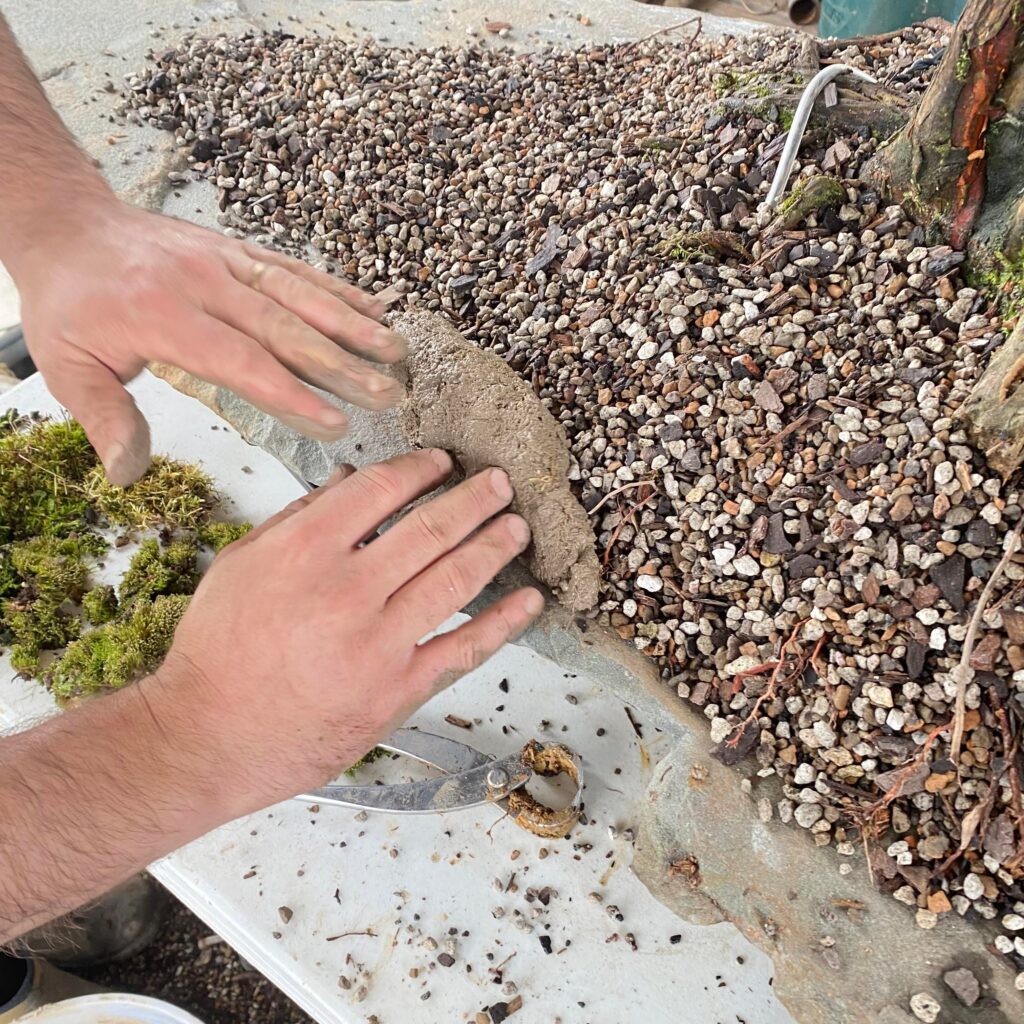
Push the clay on the stone to make a seal and then kneed the clay up and over the roots.
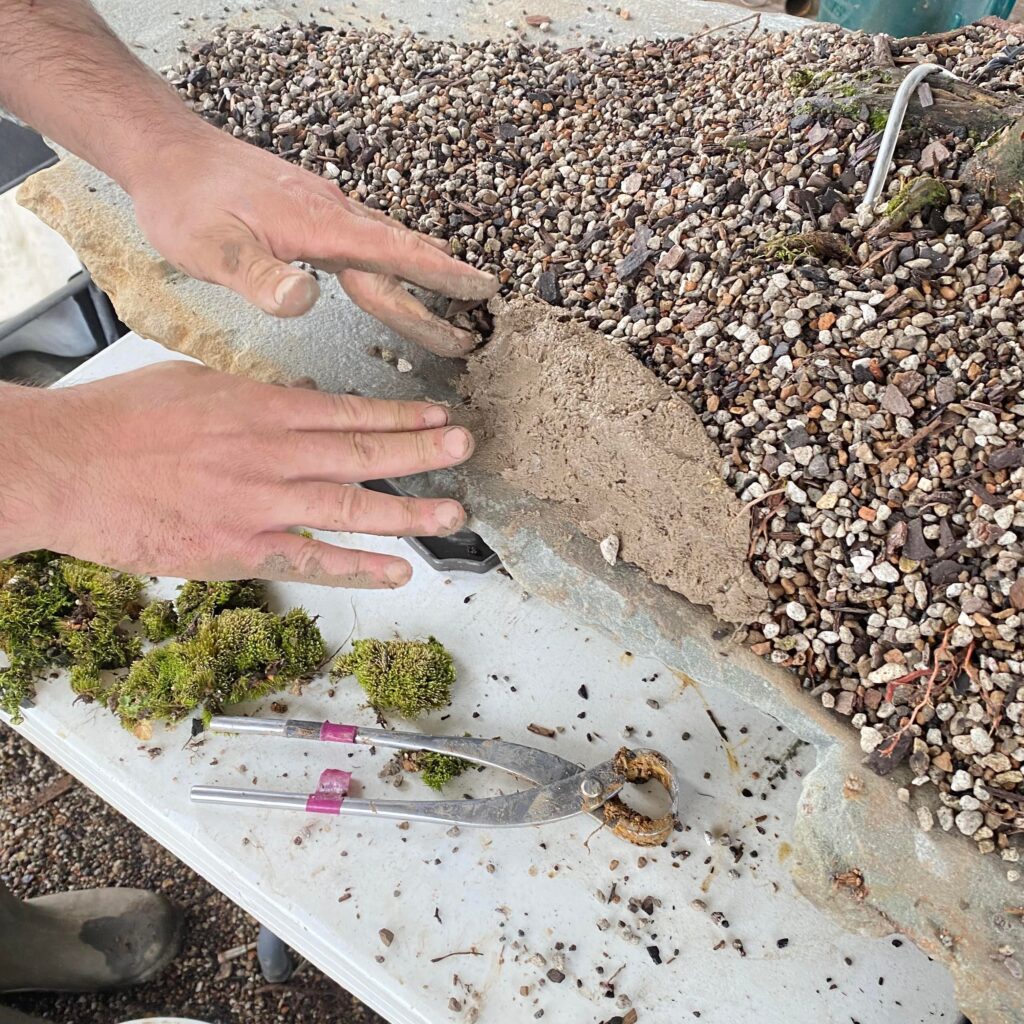
You should start to get a sort of shell shape. There should also be a slope to the muck and not a straight vertical wall. Overly vertical walls of muck will not hold soil and roots well and could fall right off the stone.
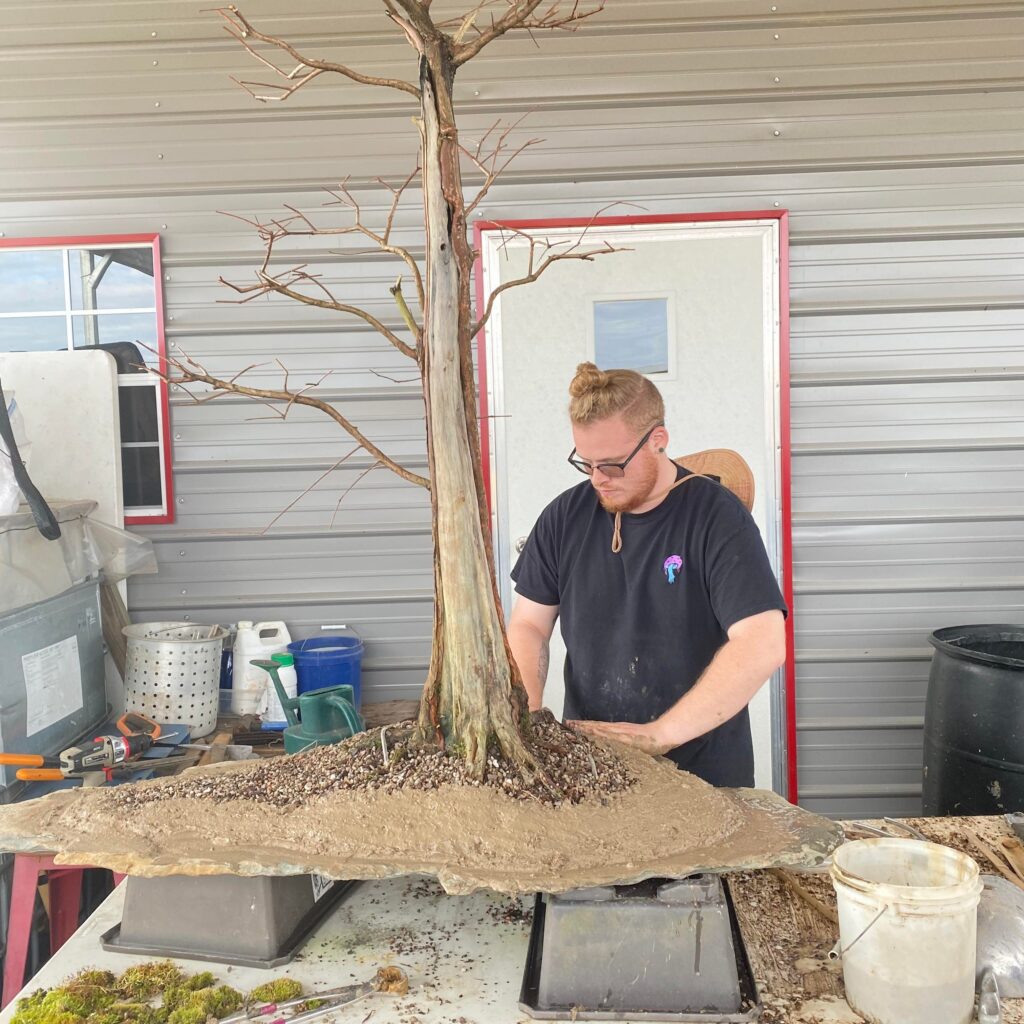
You were probably wondering who Gavin is that was mentioned earlier. He’s our newest nurseryman at Underhill Bonsai. He’s been taking the photos and assisting in the heavy lifting. He took to forming the muck walls very quickly. We got a nice and gently slope from the base of the tree down to the edges of the stone. The tree looked as though it had just been there all along by the time we were finished up.
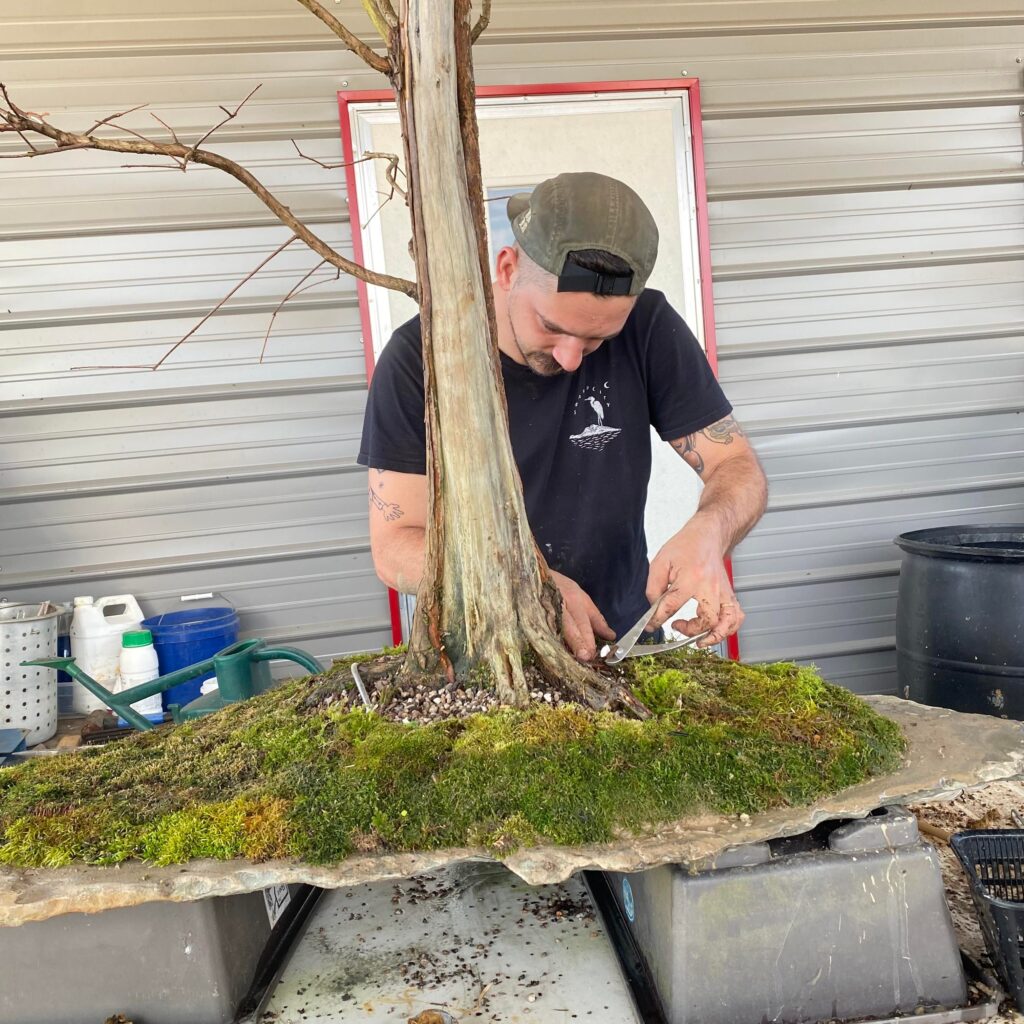
The muck is now mossed completely. The moss serves quite a few proposes here. For one it help the muck not get washed away during watering and rain. Two, it help regulate the temperature of the roots and has somewhat of a symbiotic relationship with the tree. Once the tree sets roots the moss will create the perfect barrier and air prune the roots downwards and back into the core. This is when the magic begins and the microenvironment comes to life.
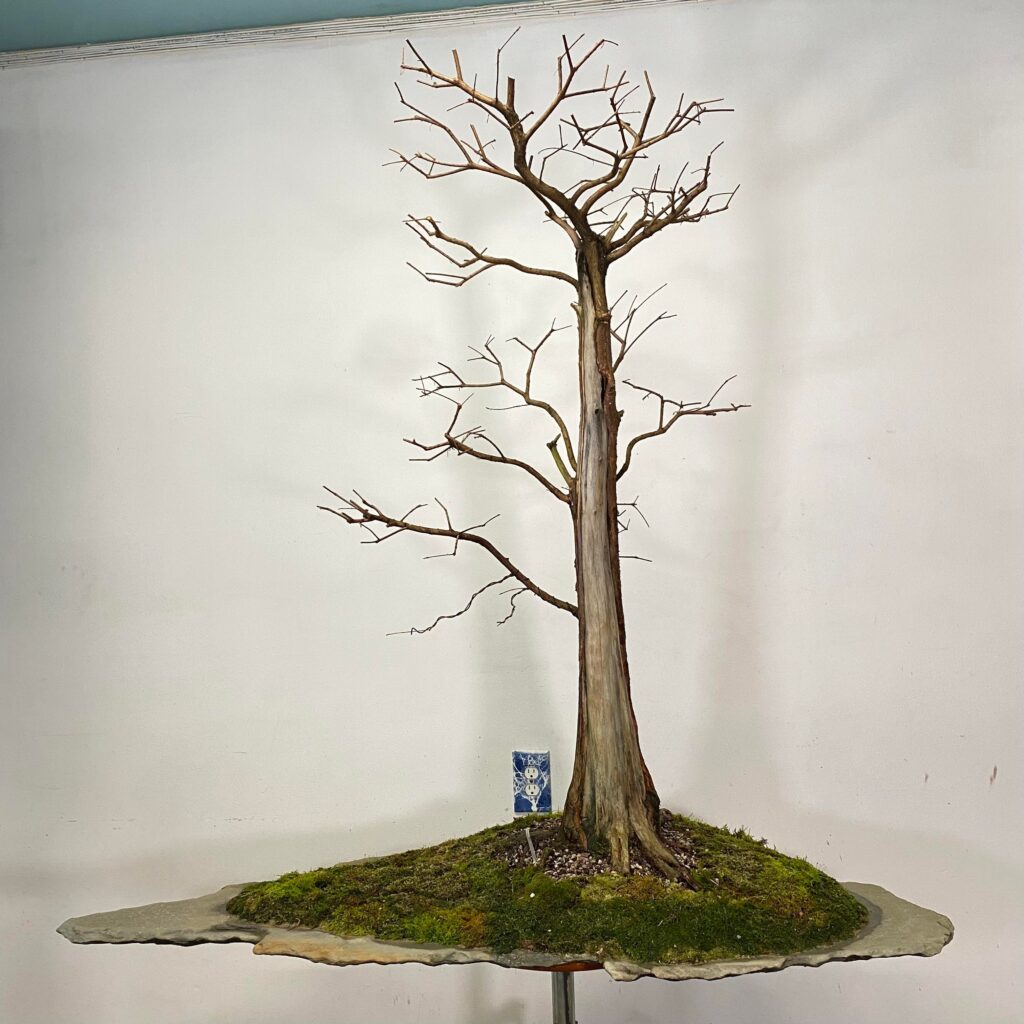
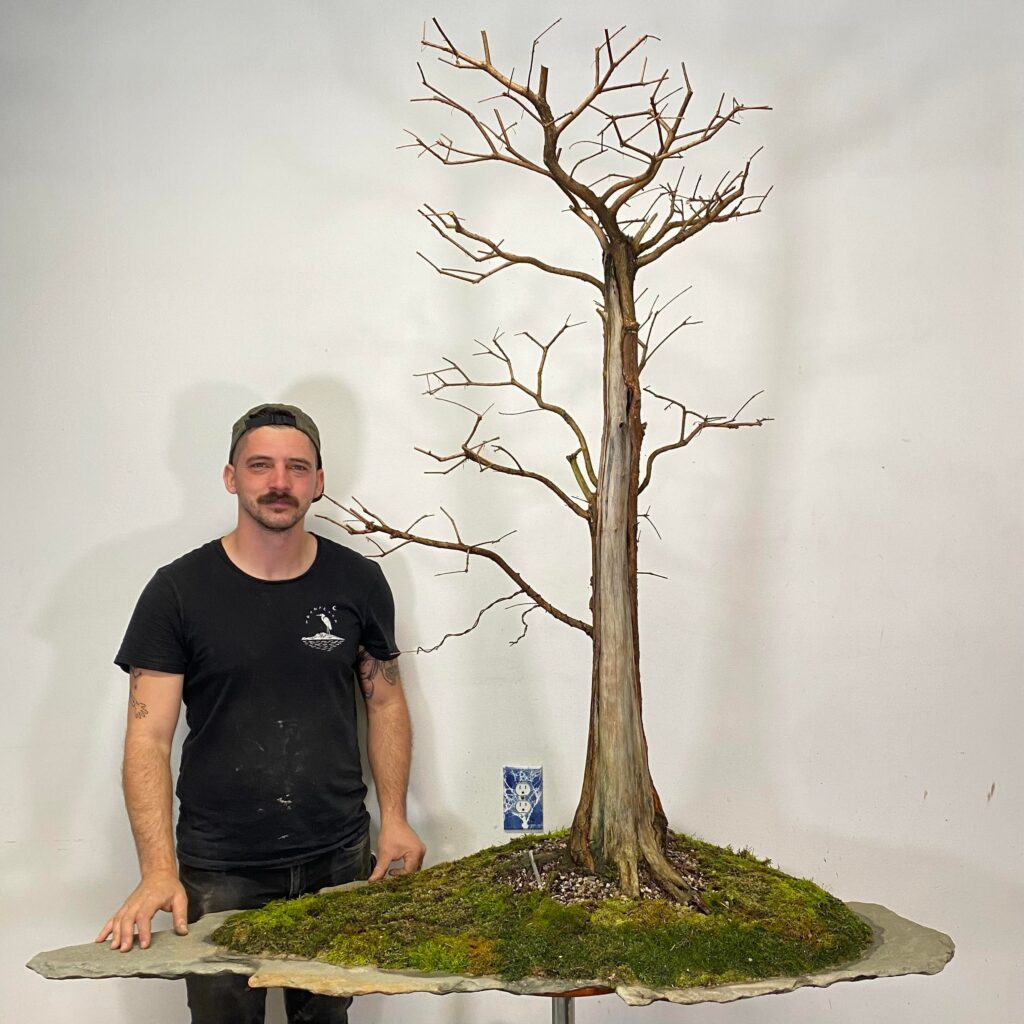
The final product of our labor. It’s better then I imagined to be honest. Once the tree buds out in the spring and begins to fill back in I think the show will be outstanding. I’m already enjoying the winter silhouette and we can only improve upon the design from here.
The next fun part is figuring out how to display the tree in an exhibition. Being both on a stone slab and also an individual tree planting opens up a lot of display possibilities. I have a few ideas but I’m in no rush at the moment. Time to just enjoy the dormancy period and work on other bonsai projects.
-Evan