
Okay, it’s time to clear up a lot of things up about these little potted stump trees we have everywhere around the nursery. For those who don’t know, I’m referring to all the freshly collected yamadori. They are the trees that were dug up, heavily root pruned, and tied down into training pots this season.
Yamadori (yah-mah-doh-ree) – collecting from the mountains, basically describing wild collected trees and plants for bonsai.
Numadori (new-mah-doh-ree) – collecting from the swamps, basically me just changing out the Japanese word for mountain to swamp.
Not knowing what to do with your tree that doesn’t have any branches or taper is normal for those who are new to practicing bonsai. When I see a stump tree, I see so much potential. To the untrained eye, it’s just a stump. So lets break down the process in designing a tree from scratch.
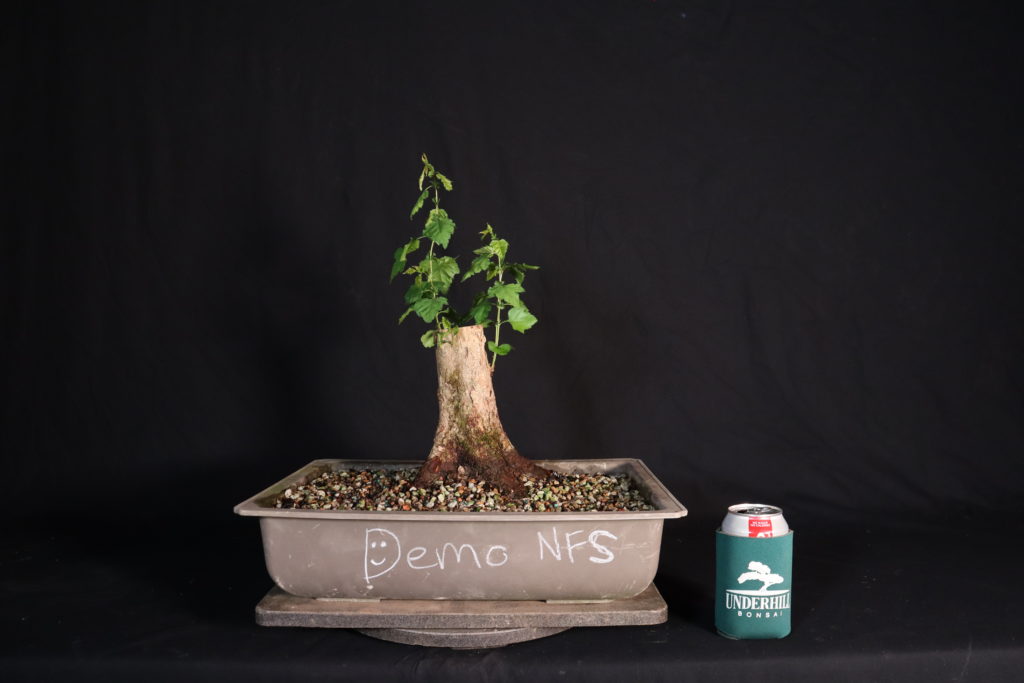
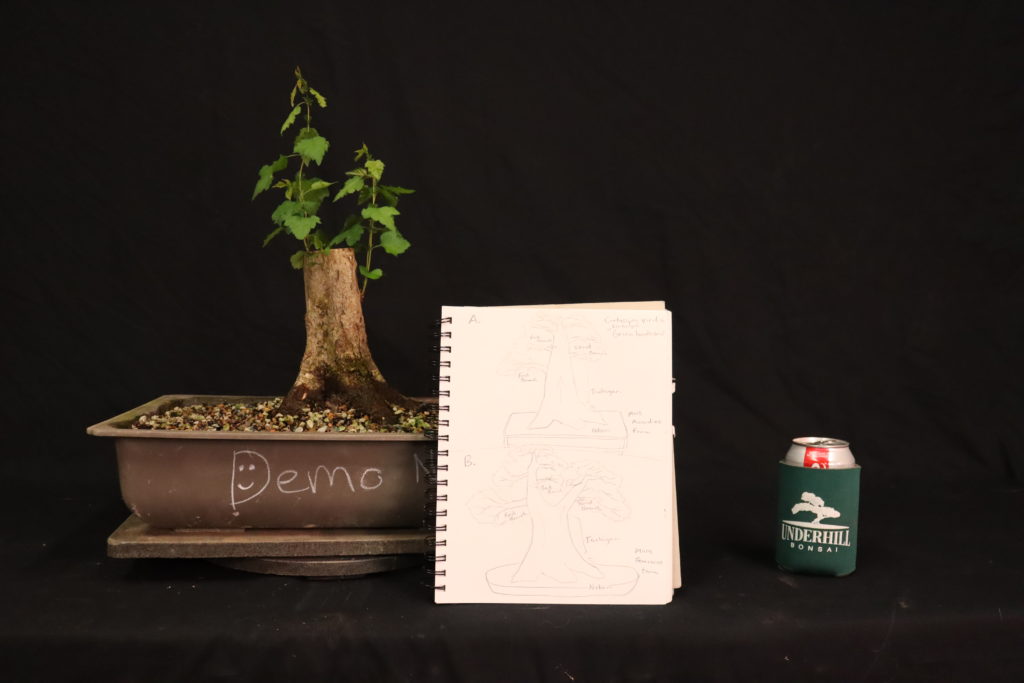
My stump tree, numadori is what I’m going to call it for now on, was collected on 1/20/20. It was one of several others from our massive yearly collecting trip for the nursery. It was also one of the five specially selected trees that would be used for the numadori collecting demonstration I gave the following weekend, and was the lucky one that was potted up by myself in front of the class that day.
It’s funny because I pruned up the roots to get it into the plastic training pot seen in the image, and someone asked me “Is that thing going to survive?”
It’s doing better than surviving honestly, now, with new buds emerging all over the trunk. I actually didn’t know exactly what species it was at the moment either. I guessed at Ulmus alata (winged elm) because of its fissured grey bark and U. alata was abundant in the area we were collecting in.

So what is this “thing”?
I’ve identified it as Crataegus viridis, the Green Hawthorn. The bark is grayish to burnt looking and paper like, peeling slightly. The emerging shoots are straight and do not have any suggestion of thorns developing that I can see. Although the leaf shape is very crataegus in appearance.
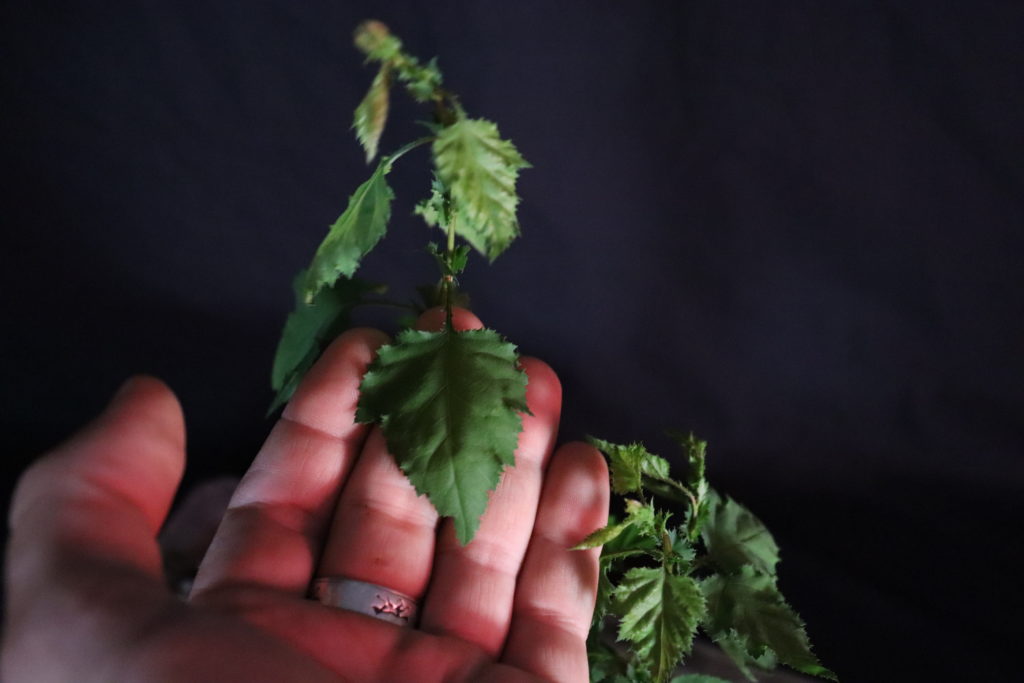
I love the crataegus genus. The leaves are nice and small to begin with and there’s a promise of small white clusters of flowers in May followed by red fruits. Although you can make jellies from both C. viridis and C. aestivalis, it is not to be confused with C. aestivalis, the Mayhaw Hawthorn. This is my first time working with this variety of hawthorn, so we’re going to learn how this species reacts to applied bonsai techniques together. From previous experiences with C. marshallii, the Parsley Hawthorn, I’ve seen that crataegus are quite vigorous. They also heal serious wounds pretty easily and typically don’t rot after trunk chopping. Compartmentalization is actually the term I should use; trees don’t “heal” wounds.
Woah, that’s the longest word thus far in one of my blog posts. Here’s a fun fact about compartmentalization and how trees recover from wounds. Trees recover from wounds through generating new growth from same spatial position. There is a chemical reaction at the site of the wound that strengthens the wood to help prevent from infections. This is called the reaction zone. Then, the tree forms another new anatomical and chemical boundary that separates the infected wood from the new healthy wood. This is called the barrier zone. We, and other animals, heal through regenerating our tissues. If we “healed” from wounds like trees do, if we were to lose an arm, we would regrow multiple new ones where our lost one was. This would be called science-fiction and very alarming. Alarming. Al-arming.
Anyway, back to the point of the blog: the questionable stump.
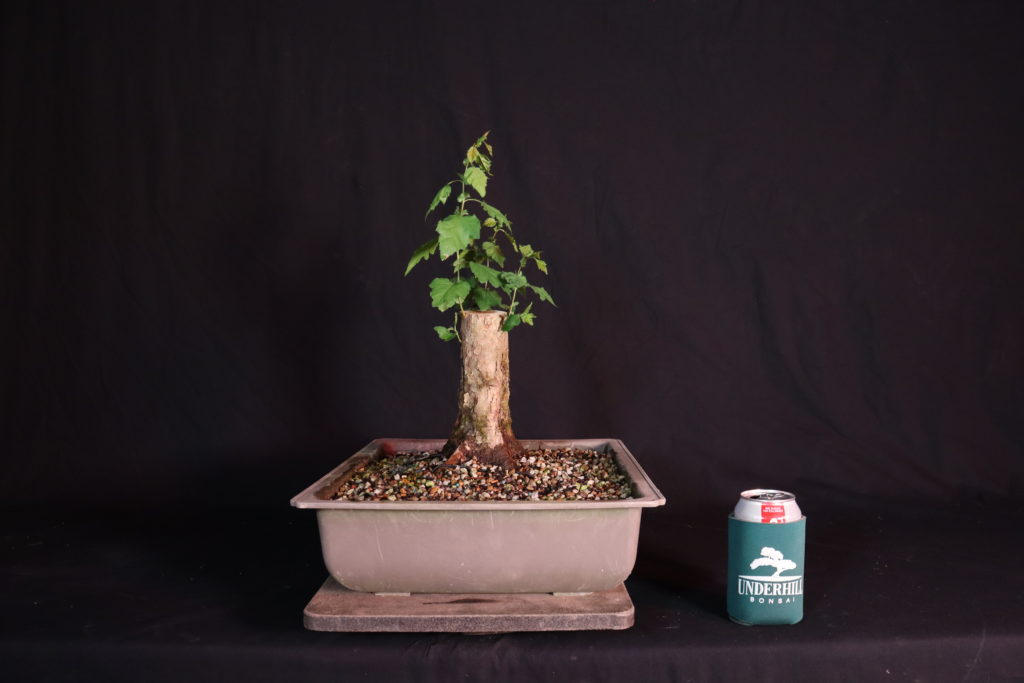
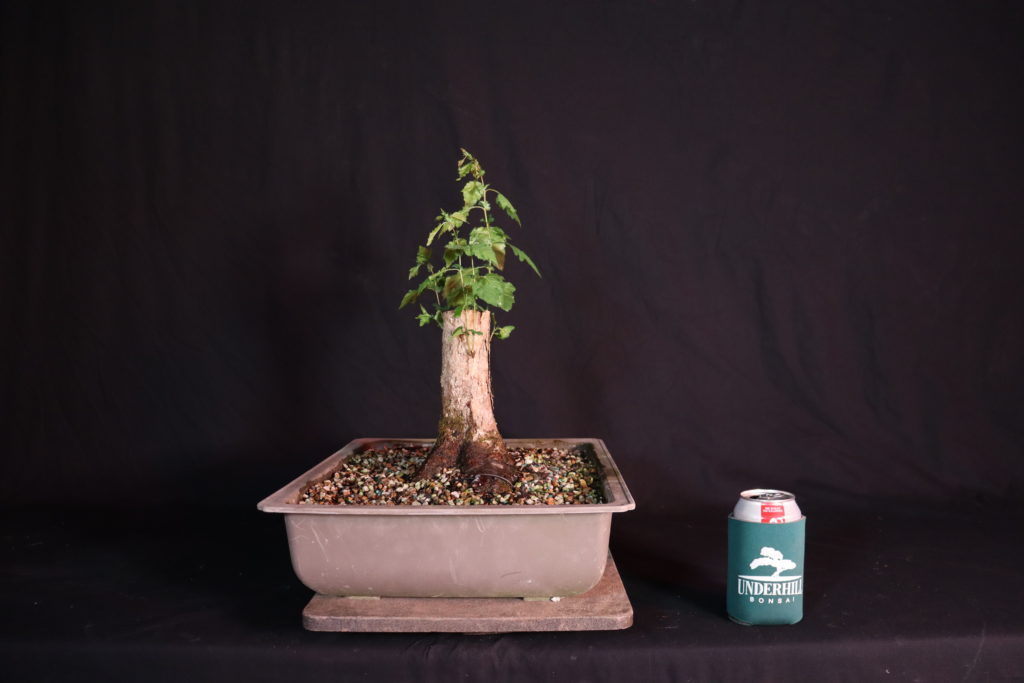
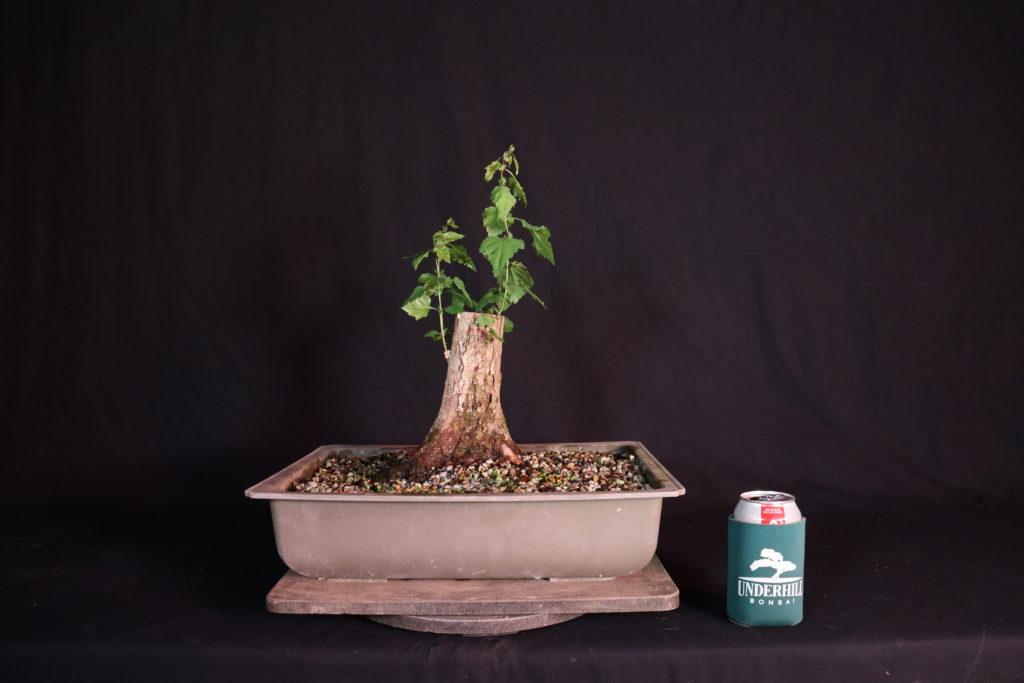
As you can see, there are nice, healthy shoots on all sides. The trunk base is approximately 4″ and has been chopped to roughly 5″. I chopped it low because I want to induce a severe amount of taper and have the finished height around 8″ to 10″. In doing so, my scale of this tree is going to be a nice and small ratio of probably 1:2 or 1:3. This is a tight ratio for developing bonsai. Typically, most professionals prefer using ratios of 1:6 to 1:12, as this creates a “convincing” tree proportionally. I believe this is a fun size and ratio for bonsai because it features exaggerated proportions and allows me to take advantage of the nice, wide nebari of this tree. One of my favorite trees in my collection is a 1:1 “Sumo” style Lagerstroemia, crape myrtle.
For those that don’t know, nebari (ne-bar-ree) is the root spread or visible surface roots of a bonsai tree.
So how am I going to “build” on to this tree? Well to start, it’s a deciduous species and it can survive a harsh chop like this and regrow new branches without leaves. Do not do this to a conifer, it will perish and you will be sad.
Step one: Chop your tree to the desired height to set yourself up for creating the ratio you are envisioning.
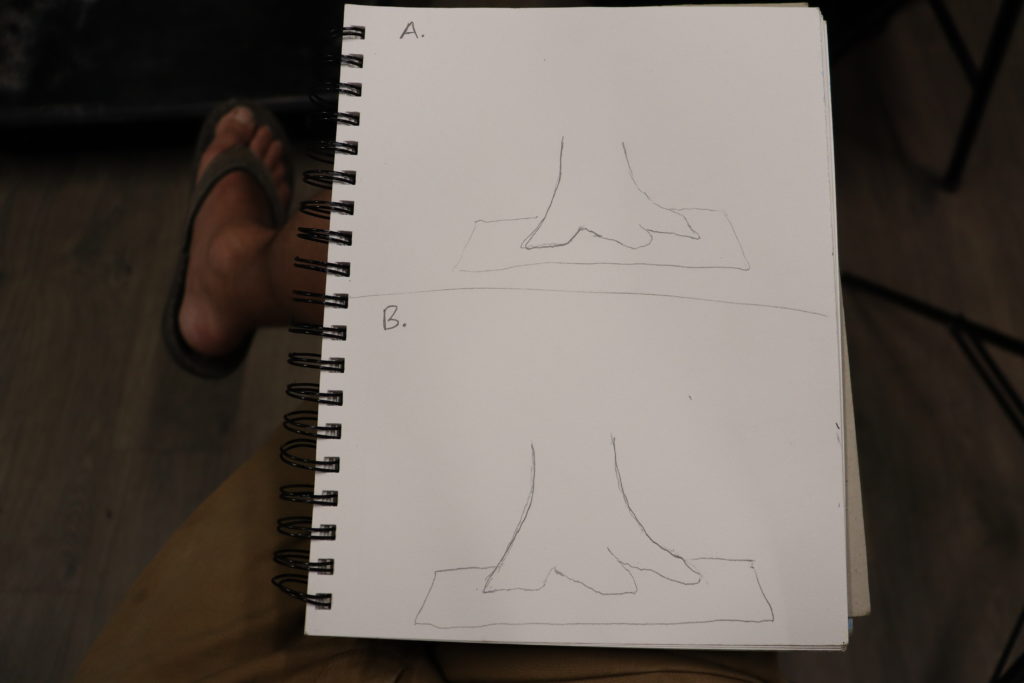
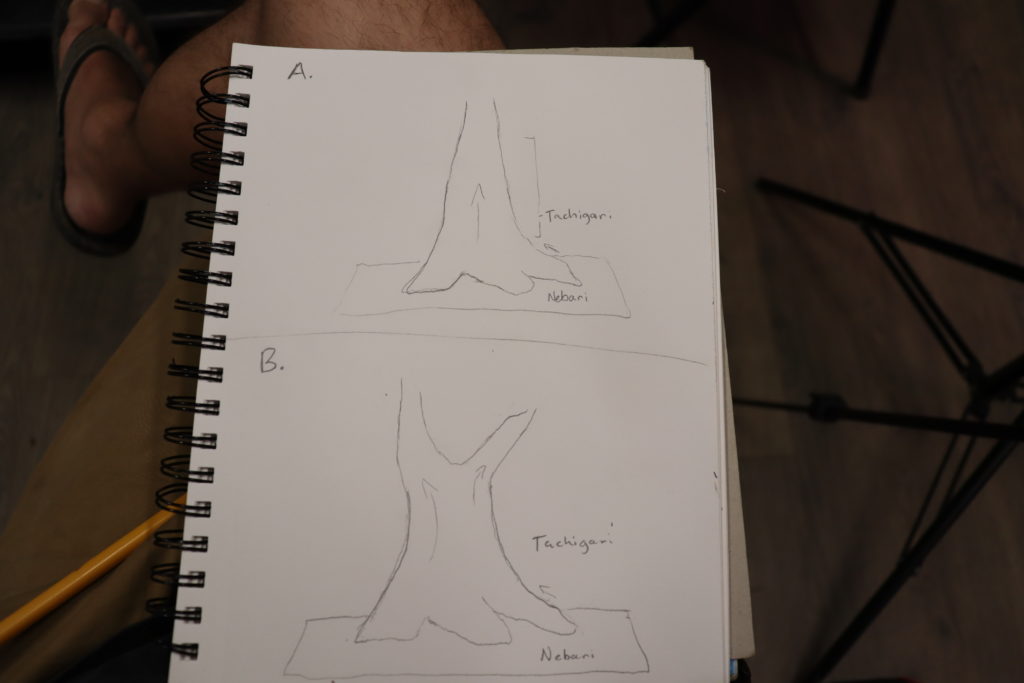
I roughly sketched out the base of the trunk to show you guys the process and the “5 year plan”. Sort of like the 5 year plan you were told to get together in high school, but instead we’re getting your bonsai’s life together. I sketched out the nebari and the potential tachigari.
New Japanese bonsai word alert!
Tachigari (tah-chi-gar-ree)- The section of the bonsai’s trunk between the nebari and the first branch. This is deemed as the most important section of the tree’s trunk because it is the most visible and begins the line of the tree.
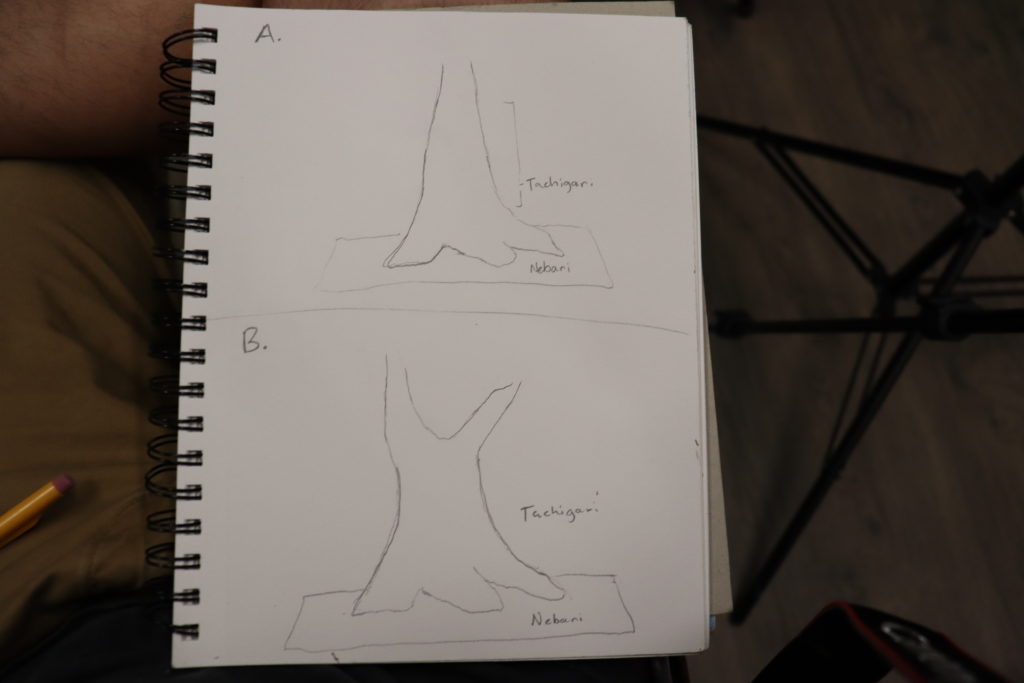
I made two sketches so you guys can see the few of many opportunities for this tree. I choose the two simplest deciduous forms so this blog post doesn’t have to be a book’s worth of information: A) Chokkan – The single trunk formal upright form; and B) Sokan – Twin trunk, the mother and daughter form. To get to the next step shown in the illustration, I will have to choose a leader, or line of the tree, to be the new apex of the tree and allow it to grow freely. Once that new shoot becomes the new leader, I will have to wait for it get to the appropriate size to carve the trunk into it. From there, the taper will be greatly improved and will be able set up the initial branching of this tree.
Step Two: Grow up a new leader for your tree and wait until it gets to the appropriate diameter you are looking for. Carve the trunk into the new leader. (I will post a video later on this Summer to demonstrate how to carve into the new leader.)
The tree’s line is very important and plays a big part in how your foliage mass will be applied to your design. The movement from the nebari coming from the right side suggests that the first branch will end up somewhere on the other side of the trunk. I want to create a Harmonious Design for this tree. Harmonious Design is a term coined by Ryan Neil, and refers to how the movement in the tree’s line and apex follow each other, creating an image of loftiness. More on that in another blog post.
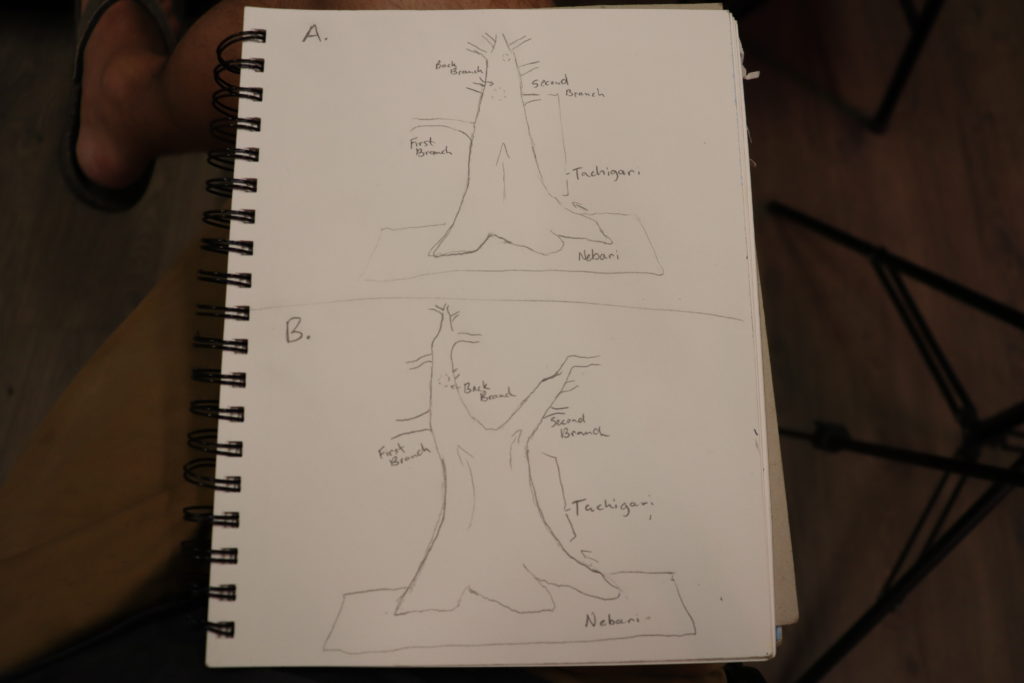
Notice that the first branch, or defining branch, is larger and it is the lowest branch in the structure. The first branch sets the balance of the tree. Our design is going to be a firm and stable feeling. This composition is not going to be depicting a tree on the edge of a cliff or a tree wondering back and forth searching for sunlight.
Step Three: Choose the form and initial branches in which to set the foundation of your design.
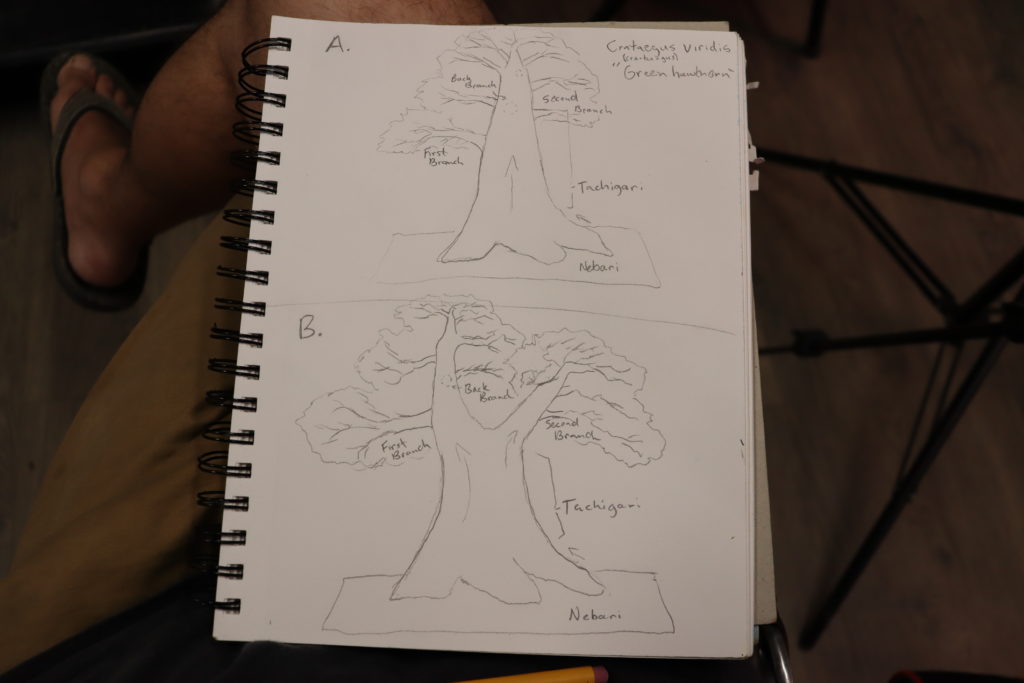
This demonstrates what the potential foliage masses could look like and give a view of what our tree might look like. This could be the tree in 5 years.
5 years. In the terms of bonsai this is actually not a long time. There are living specimens over 400 years old in Japan and in the States. We are planning on keeping our trees, at least the ones that are most important to us, for the entirety of our lifetime. In this scope, 5 years is just the beginning of a life long journey. The first 5 years is the building of the structural branches in which we will increase the ramification upon. We will create a highly refined work of living art.
Step Four: Refine your tree’s branches and love it.
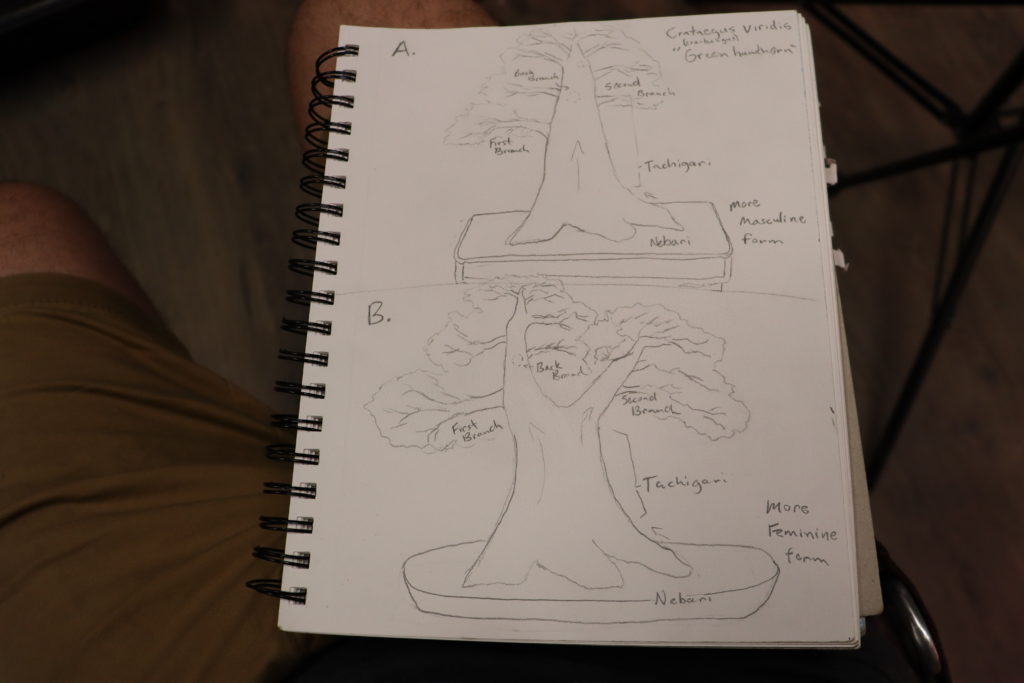
Choosing a container pertains to the masculine or feminine qualities our tree will have later on in its development. This is something we can go into MUCH later on when we get there. This isn’t a race, it’s a journey.
Step Five: Slow down, loosen up.
So from here, all I have to do is fertilize and grow the tree’s leader out. That’s the most work I’ll be doing on this one tree all year. As easy as that.
I will be be posting images of this tree every month on the Underhill Facebook page so that we can literally watch it grow. This is truly exciting because now I can clear up all this conflict of what to do next with a stump of a tree.
Cheers,
Evan