
Here’s a species you don’t see often being used in bonsai, the American sweetgum. There are so many different species we could use for our practice, and it’s sad to say that this beautiful tree usually ends up near the bottom of the list of candidates. So it seems my style of selecting species for bonsai finds its bases in the outliner choices, but I promise this is an excellent tree for bonsai!
The American sweetgum, Liquidambar styraciflua, is native to the southeast United States and can be often found in dense hardwood forests. They can be easily mistaken for a species of maple because of their leaf shape. Let’s take the common maple in the southeast US range, the red maple, and Acer rubrum, and compare them side by side.
Side Note: The red maple, Acer rubrum, is the most common deciduous tree in the United States. It has such a vast range that it has evolved variants that can thrive in entirely different climates. For example, in the wetlands of Louisiana, we have the Acer “Drummond’s” rubrum, commonly referred to as the swamp maple.
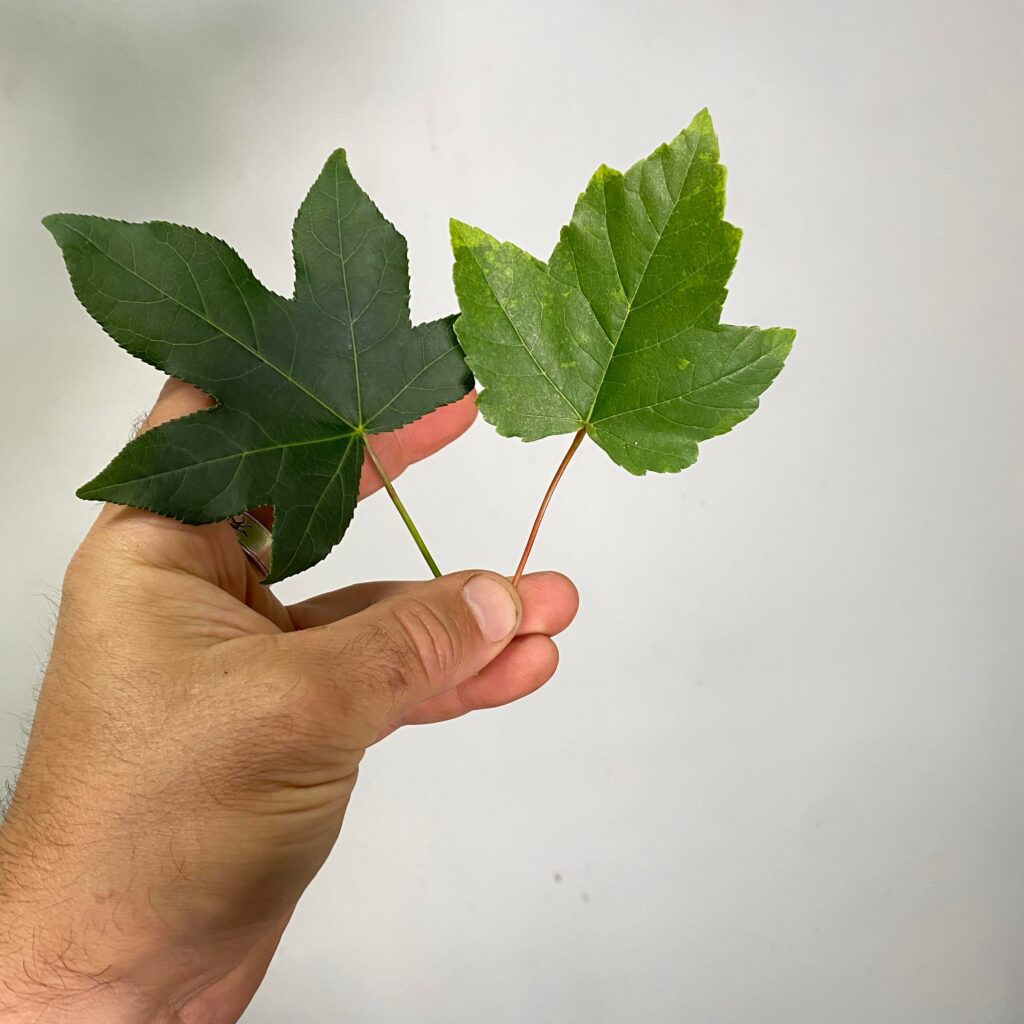
The sweetgum is on the left, and the red maple is on the right. Notice the petiole of the sweetgum is green, and the petiole of the red maple is, wouldn’t ya know it, red. Another distinguishing traits are that sweetgums have doubly serrated leaves. Meaning they have more of a saw tooth edge than the red maple. Both are palmate and resemble a hand shape, but the sweetgum is noticeably more elongated. The most obvious difference here is the color, with the sweetgum being much darker green and the red maple having more of a yellow-green color.
Something else that sets sweetgum, Liquidambar styraciflua, apart is the fruit it produces. The odd-looking fruit hangs from mature branches and resembles literal spiked balls. Most people in the southeast are very familiar with these spiky balls as they have stepped on many of them throughout their lives. It’s not pleasant if you are barefoot. Personally, think it is an excellent feature of the tree, and I hope to see a well-developed L. styraciflua with them hanging from its branches.
The last thing that makes L. styraciflua easy to spot in the wood line is its fall color. Some deciduous trees show fall color in shades of red and others in shades of yellow/gold, but the L. styraciflua has to be different and show purple coloration. This is not an exaggeration either, as it is a striking display, especially when they are amongst all the other colors that contrast beautifully with them.
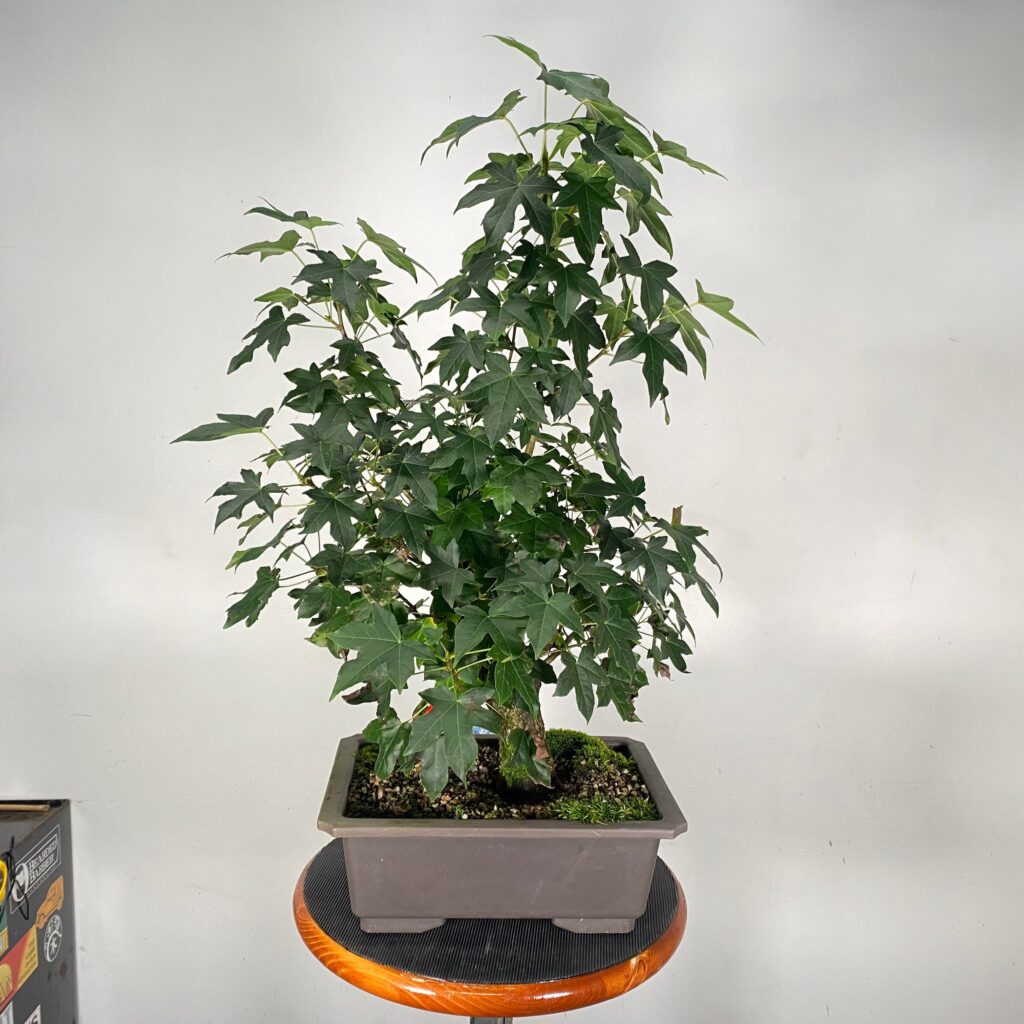
Here’s the L. styraciflua I’ll be working with today. One thing that stands out right off the bat here is the leaf size. I know the goal here is to have tiny leaves to make the viewer think we have a small tree in a pot, but there is a way to fix this. A good comparison is the sea hibiscus, Hibiscus tiliacues, as it also starts with a reasonably large leaf. I’m referring because both trees can significantly reduce leaf size. If you let an H. tiliacues grow strong without pruning, you will have a big round leaf the size of your face. With energy balancing and timely pruning techniques, you can significantly reduce the internode length and leaf size to under a 1/2″. The same applies to the L. styraciflua as well. You can get similar cluster types back budding on both!
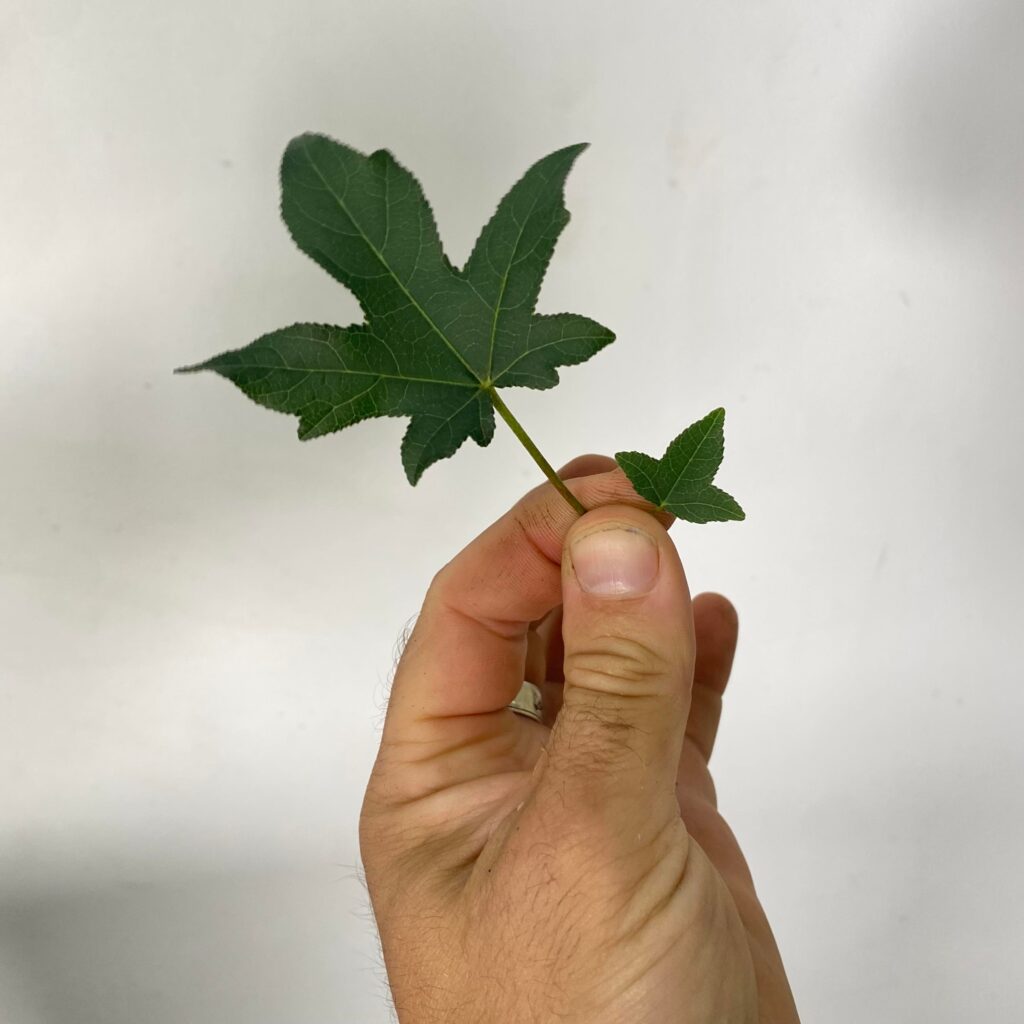
Look at that tiny little leaf, barely bigger than my thumbnail. You can use a few other techniques to get the leaves to reduce on trees with larger leaves. Once the tree’s main structure has been grown, we are good ways into the refinement stage of the tree’s development; we can then restrict root space and fertilizers. You might be asking why we even bother trying to reduce the leaves on this tree and why not use another species with a naturally smaller leaf. My answers are one, I like the process and challenge, and two, the features of L. styraciflua are well worth the work.
Features of L. styraciflua:
- It has a corky bark that develops a mature plated look at a younger age.
- The branches sometimes can have wings like my favorite species, the winged elm.
- Fast and vigorous when in development. This makes blowing out branches for size quicker.
- High CODIT, as mentioned in my previous article. This means it has a high capacity to heal wounds.
- Unique leaf and fruit.
- Somewhat disease and pest free. I will discuss what to look out for shortly.
- Stunning fall color, as mentioned before.
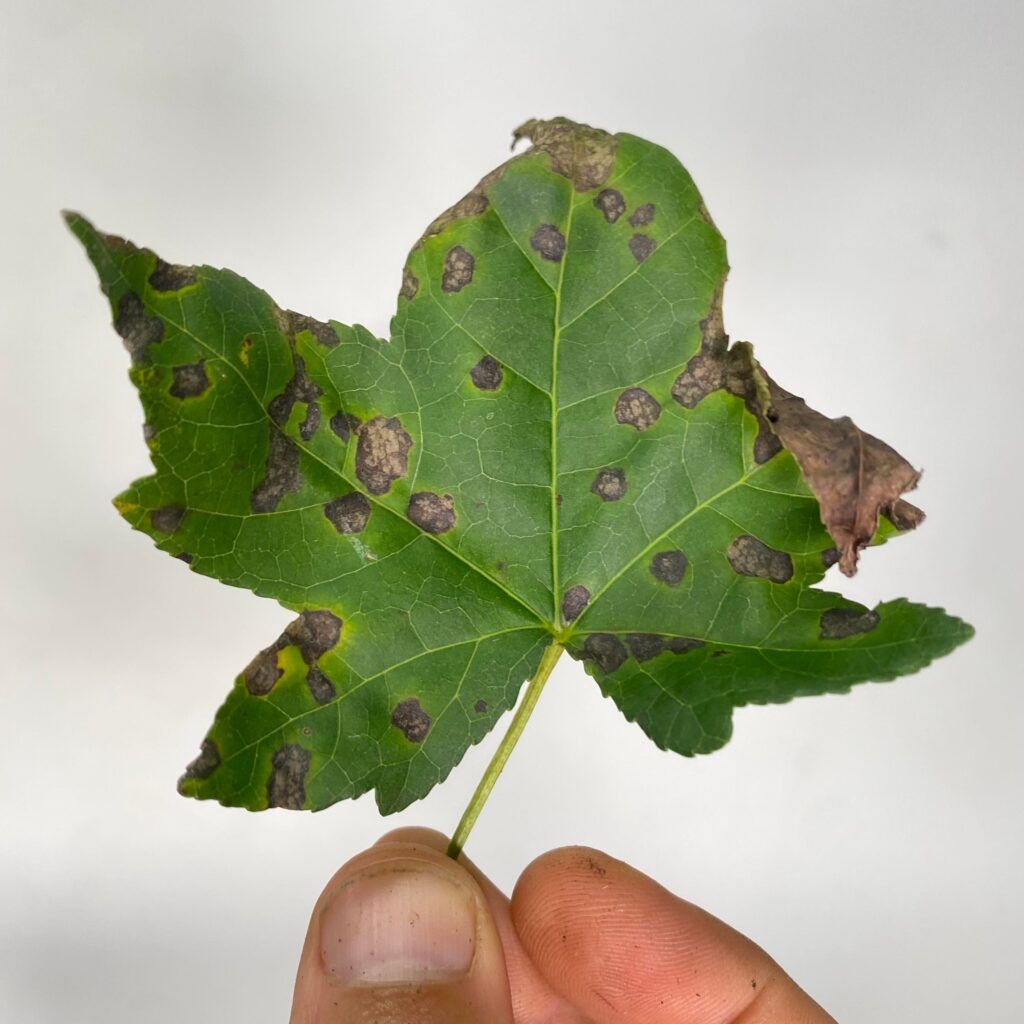
Here is a native infection called Dicarpella dryina. It’s a fungus that transmits between several different species of hardwood deciduous trees. It’s pretty common in the southeast United States, and there isn’t much of a cure for it. The best way to control and prevent it in the future is to remove the infected leaves, even fallen dried leaves, from the soil surface and discard them. Burning the leaves works best as the fungus can recur from spores. If your L. styraciflua has this fungus, don’t worry, it is a cosmetic disease and easy to reduce visual damage.

I have previously done some work on this tree. It was collected, so there are a few natural hallows and a nice bark texture. I carved the top into a new leader for the apex to form, so branches that have gotten out of proportion like these pictured here will be removed. However, If you look at the base of the large branches, I can grow them back or maybe even start a bifurcation closer to the main trunk line.
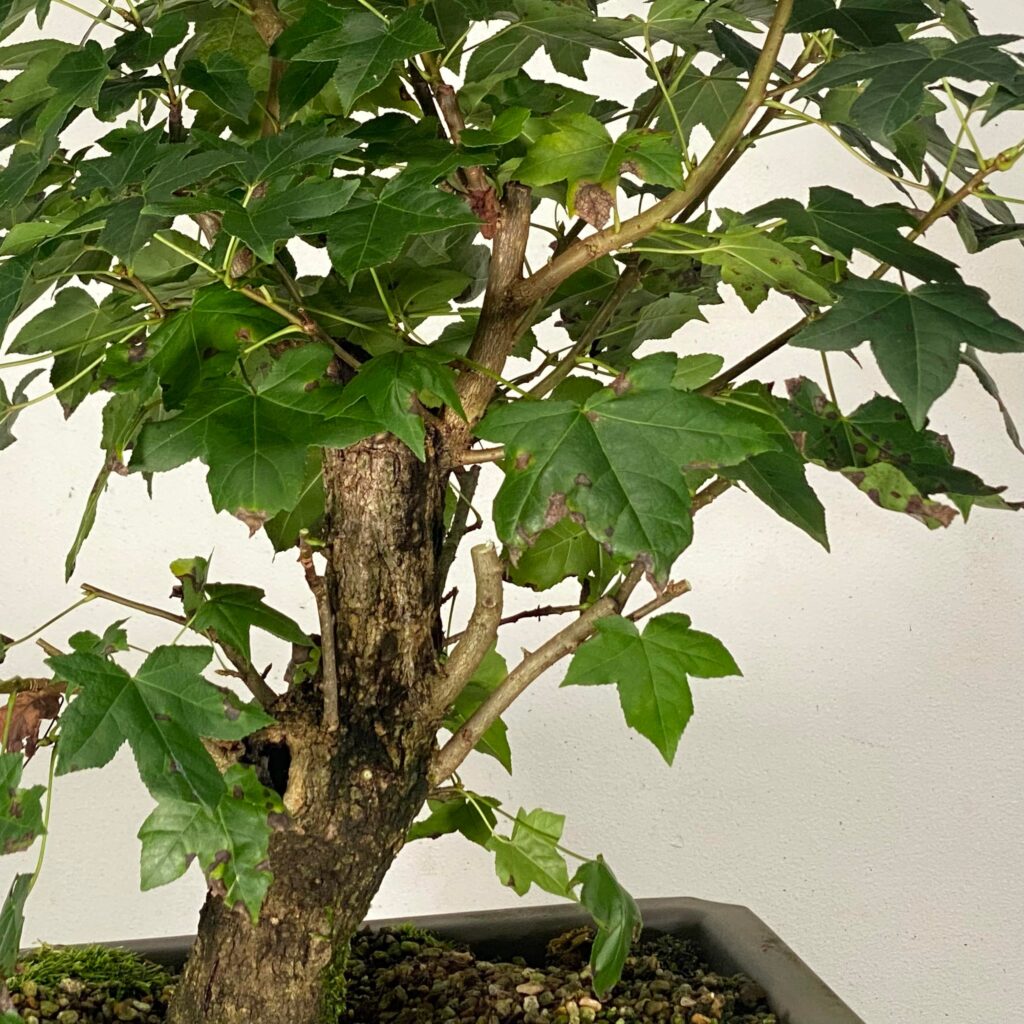
I usually reduce larger pieces like this back to viable buds I might be able to use in the future. One of the things I like about L. styraciflua is that the buds are evident, meaning they’re easy to see. Directional pruning is a breeze on these trees.
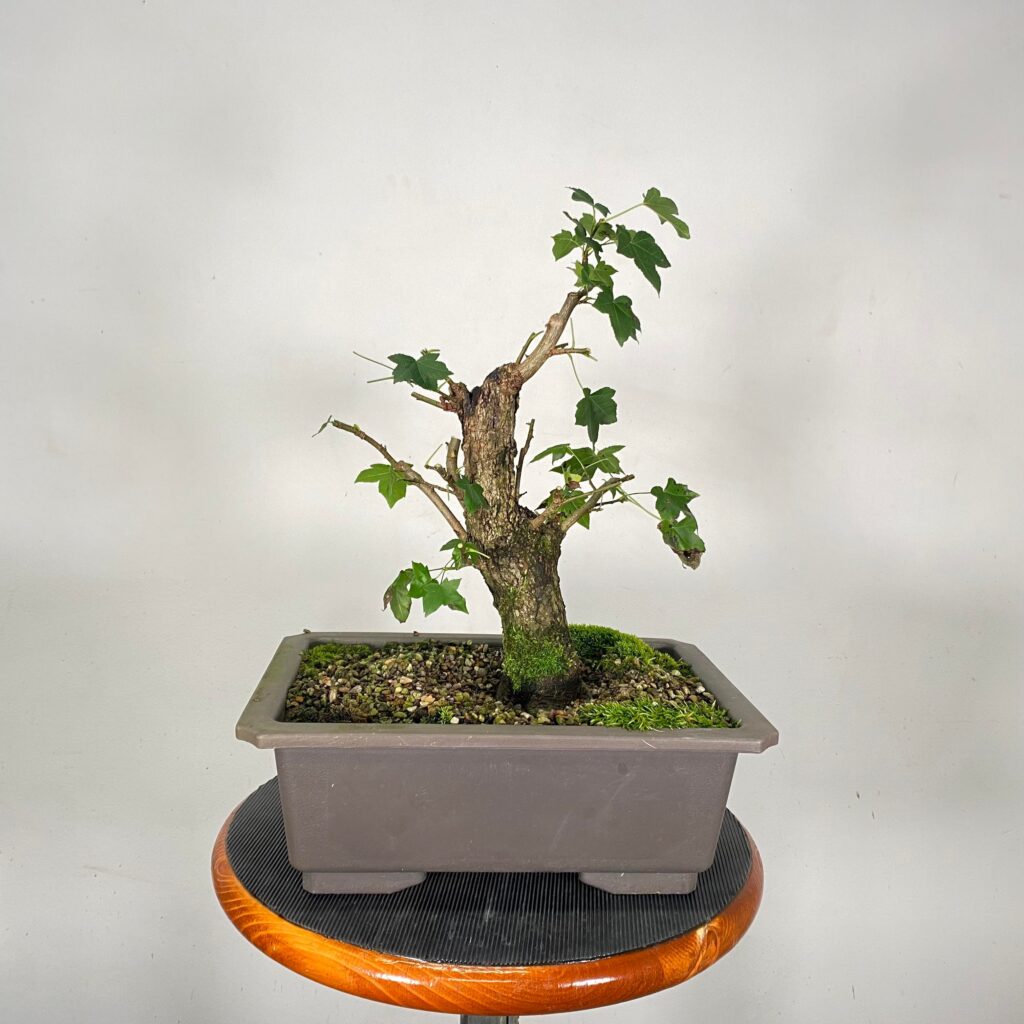
After pruning back all the overly long branches and twigs, this is the tree. You can clearly see where the bud take-off occurred early in the season on the branches. The internodal length goes from a few millimeters apart to an inch or so when the tree takes off with high nitrogen feeding; I prune back to the shorter internodes to increase the twig density and push the tree to move energy across more buds. This is a big part of making the future leaf reduction process more straightforward.
I found the branch to the left, and the twigs below it were pulling away from the tree’s line. So I decided it needed to be removed.

This tree is showing plenty of promise as far as its potential design. It will have a lot of movement to the right as I regrow the secondary branching. I’m happy with the tapering in the trunk leading up to the new apex, and the carving I did has a good cambium roll. The chop is not very large and could be healed in about 2-3 years, given that I let the top run free each growth season. The nebari on the tree is buried just below the surface, but there is a nice little flare in the surface roots. As this tree develops in a shallower and shallower pot, the root spread will flatten out, making the nebari border in time.
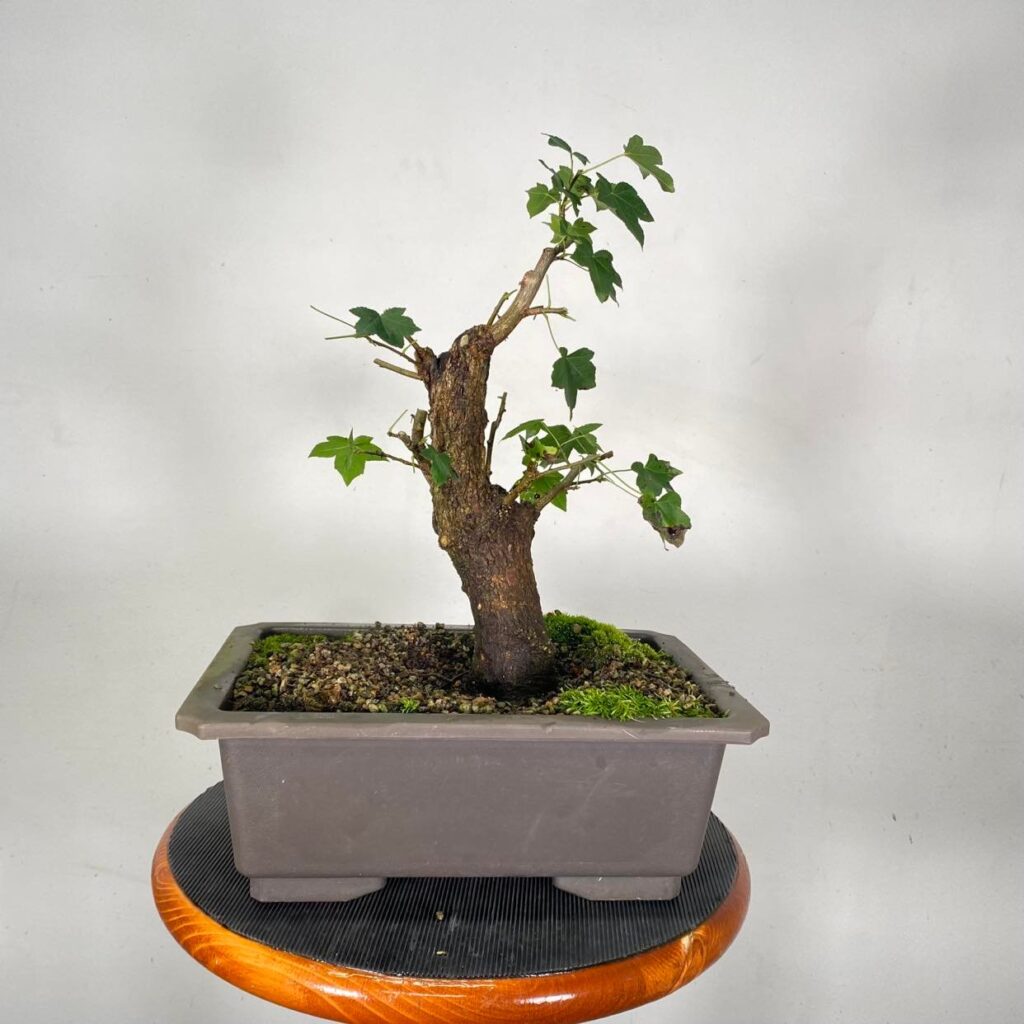
Here is the tree after cleaning off the moss and mildew from the trunk. The new branches will get corky as they develop and match the roughness of the main trunk in the coming years. This is just the beginning of this sweetgums story, and I will post another one I’ve also been working on soon enough. I’m waiting for cooler weather, so I can do a little hard cutback and hopefully repot it in the spring. As for the one in this article, I think it can remain in its pot for another year as I don’t want to set back the development too much.
-Evan