
It’s the time of year again! Time to get out all the tools you would not assume to be used in bonsai.
Woah! Slow down cowboy!
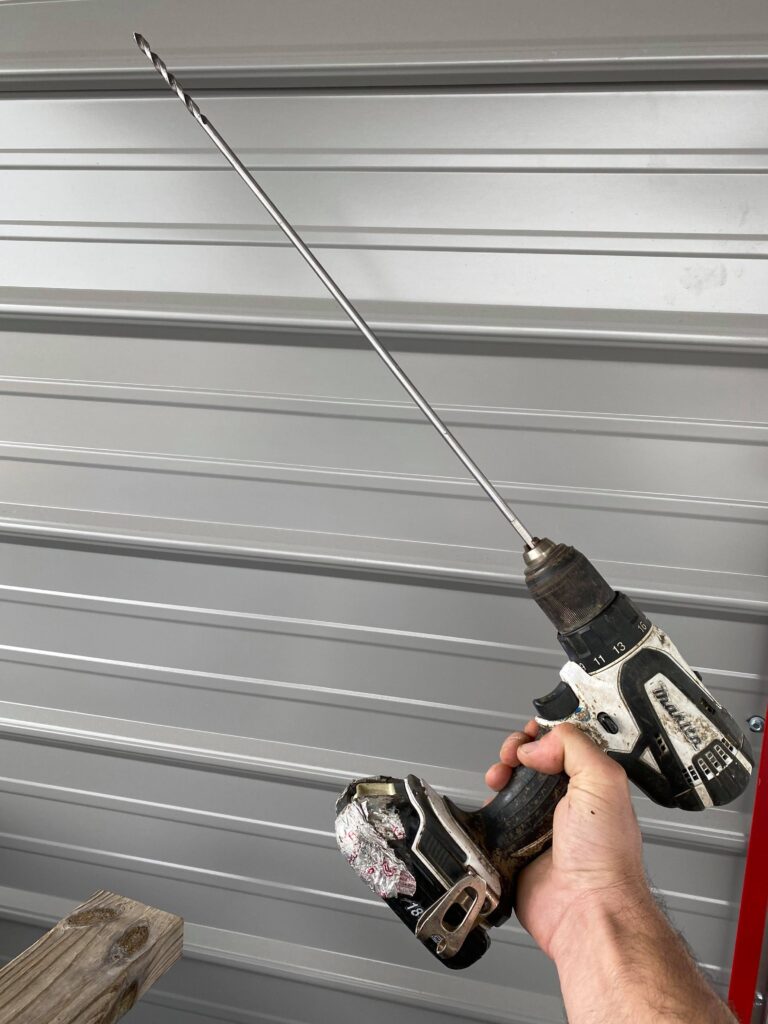
Why would we ever need a power drill equipped with a 12″ long drill bit for bonsai? Well I’m glad you asked by reading the previous sentence to yourself, I have an answer. The answer is thread grafts and there is not really any other way to make one without causing a silly amount of damage to your precious bonsai.
What is a thread graft?
To start, a graft when working with plant material is a way to fuse tissues together in order to use a scion for a new branch. Grafting is not always about branches but can sometimes be used to stick roots onto a piece of plant material as well. In the case of the “thread” grafting, we are doing what it sounds like and literally threading one piece of material through another.
But why?
Well, in the instance that I have a tree that I have been struggling to get a bud to pop in just the right place on the trunk to give me that branch placement I am looking for, boom thread graft. Drill a hole through the tree’s trunk on the opposing side of where we want the branch to emerge and then feed a scion through it. Yeehaw!
Woah stop again. Will this not hurt my tree? The answer to this question is maybe but not really if you carry out the technique correctly. It is an intimidating process to be honest. A solid understanding of how it works horticulturally eases the worry. If you have ever seen a tree fuse into an old fence post, it is basically the same thing but the thing that we are fusing into the tree is alive. When a thread graft takes it will become a new part and continue to grow with the rest of the tree. Here’s a walkthrough of a few thread grafts I did on one of my parsley hawthorns, crateagus marshallii, I am developing.
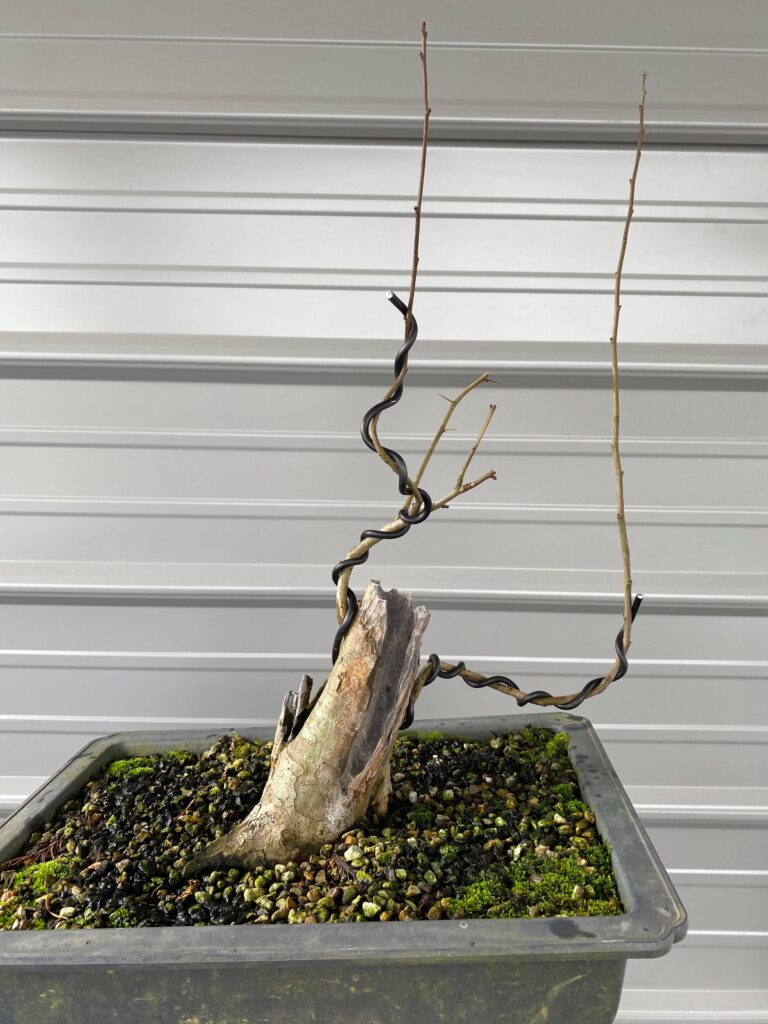
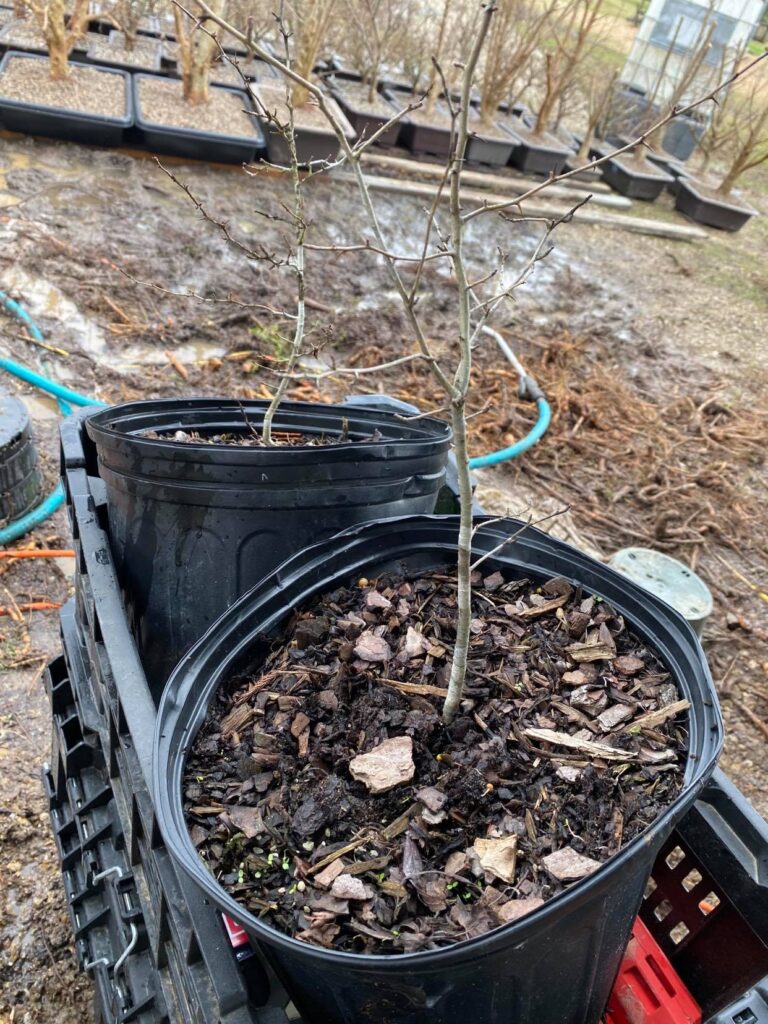
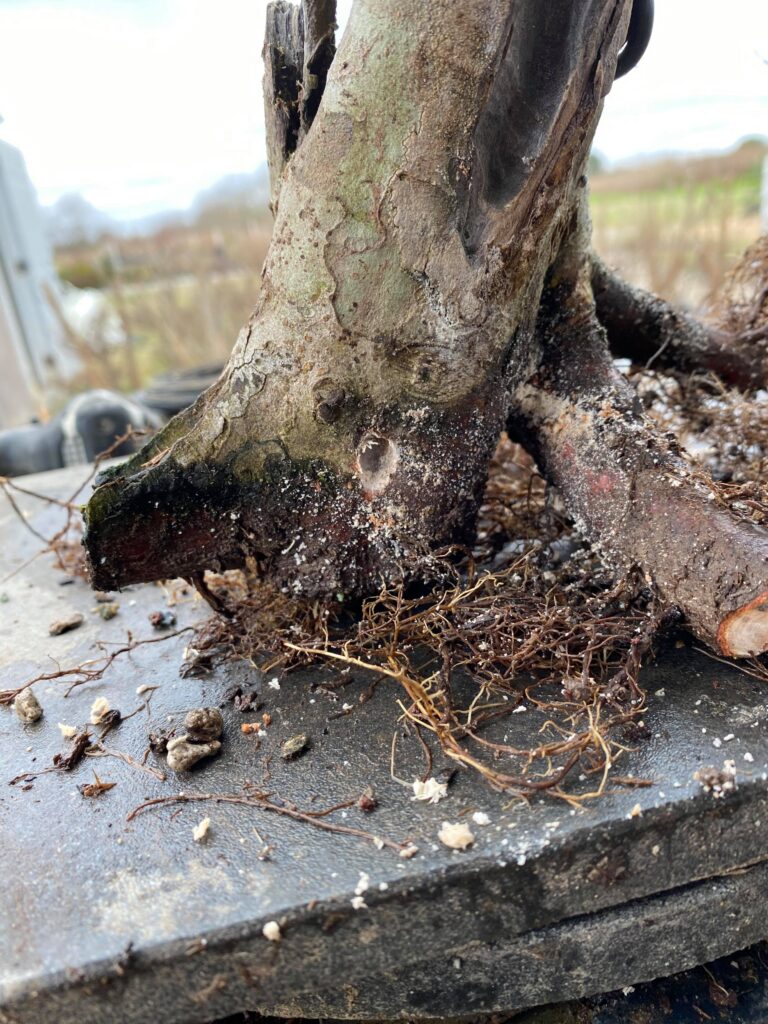
This tree is was collected two years ago. When this tree was collected it was cut to a height about 10″ taller then it is now. Sometimes when we collect trees from the wild the results are not always the best. This little stump only gave me a few shoots right at the bottom of the trunk. So I did what would work best in this situation and I cut it down to nearly shohin (a miniature size bonsai usually less then 9″) height. The carving you see in the picture is roughly 9″ from the soil line. There were very few shoots to choose from to build my new tree from so I chose the best possible options and wired them out to gain more girth. Hawthorns grow rather quickly and I figured this would be a fun project.
Here’s a thing about hawthorn, at least the ones that grow here in Louisiana natively, they do not like to bud on old wood. It’s a little bit of a challenge to get branching right where I would like it to be on any given hawthorn I work on. This species is really good at compartmentalization and heal from damage surprisingly well. Notice I did not say they heal wounds. Instead they roll cambium pretty well but they do not make real attempts to roll over the damaged area. They are very much a suckering plant because once something happens to the topside of the tree they revert their energy elsewhere. It is the nature of being an understory tree and in their environment the goal is not to become the tallest tree but the widest tree. So the solution for my problem will be thread grafts.
I waited to do this work right before bud break so that the tree has time to react.
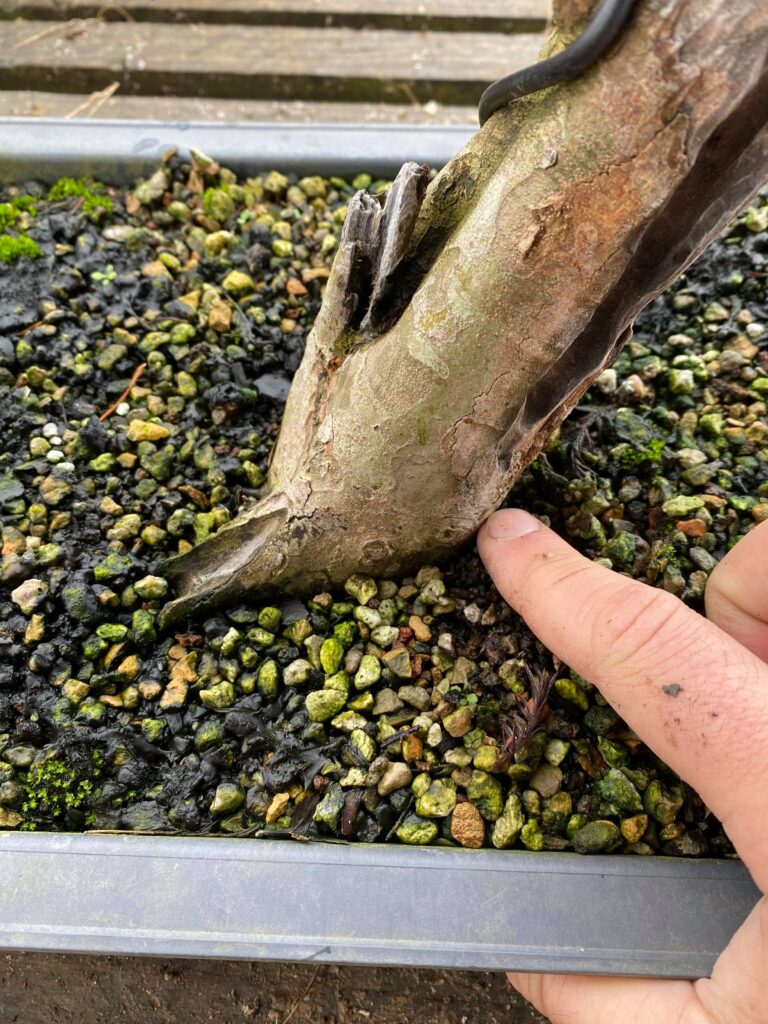
This is the first place I will be feeding a thread graft. This is the front side of the tree and there are not any surface roots between the two larger roots. My grafts will double as root grafts, more on this later on.
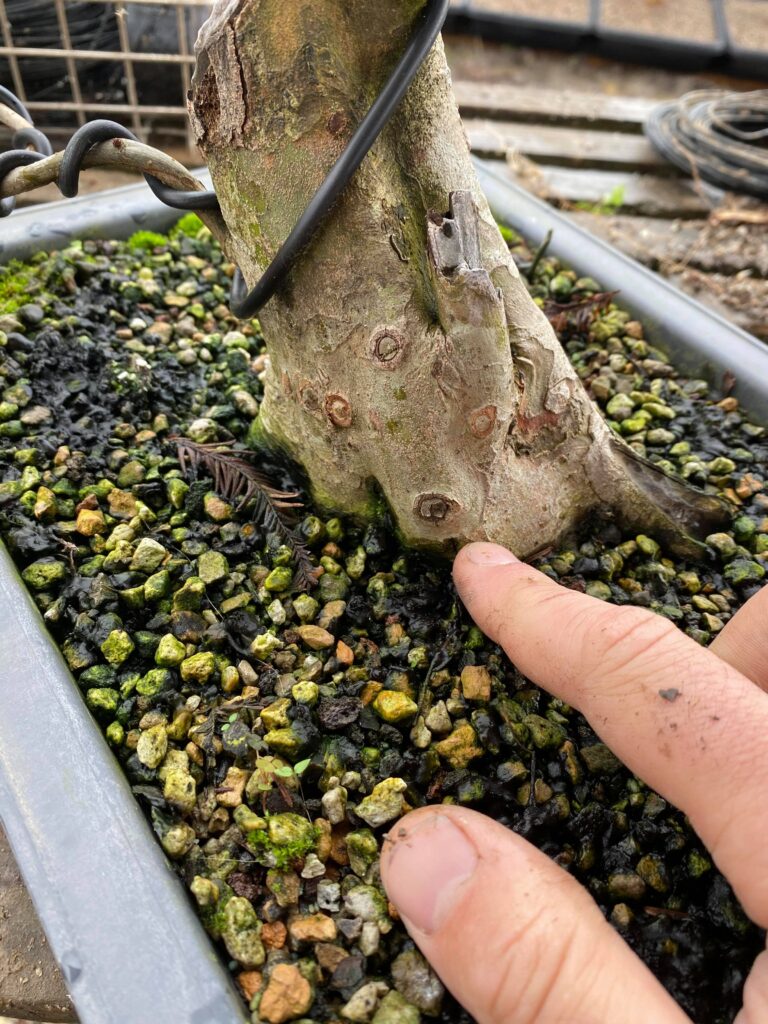
The second location the other thread graft. Yet again another area with little to no interest due to lack of roots.
My two “scions”. Scions are typically cut pieces of live branches that are wedged into a cut on the trunk. Look up grafting techniques and have your mind blown. With the right application it seems like the possibilities are endless. My “scions” are more like what you would call “whips” or a young plant that is usually 1-2 years in age with little no strong branching. They resemble actual whips most of the time but my little hawthorns have branches. I will have to trim them back to make them work for me.
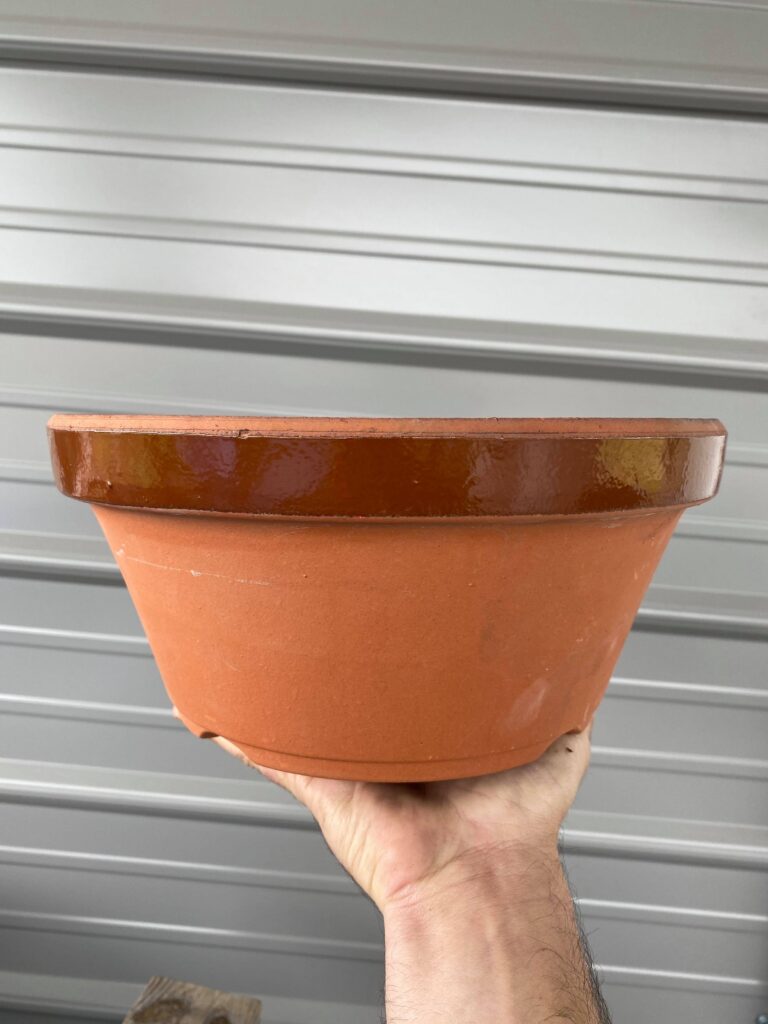
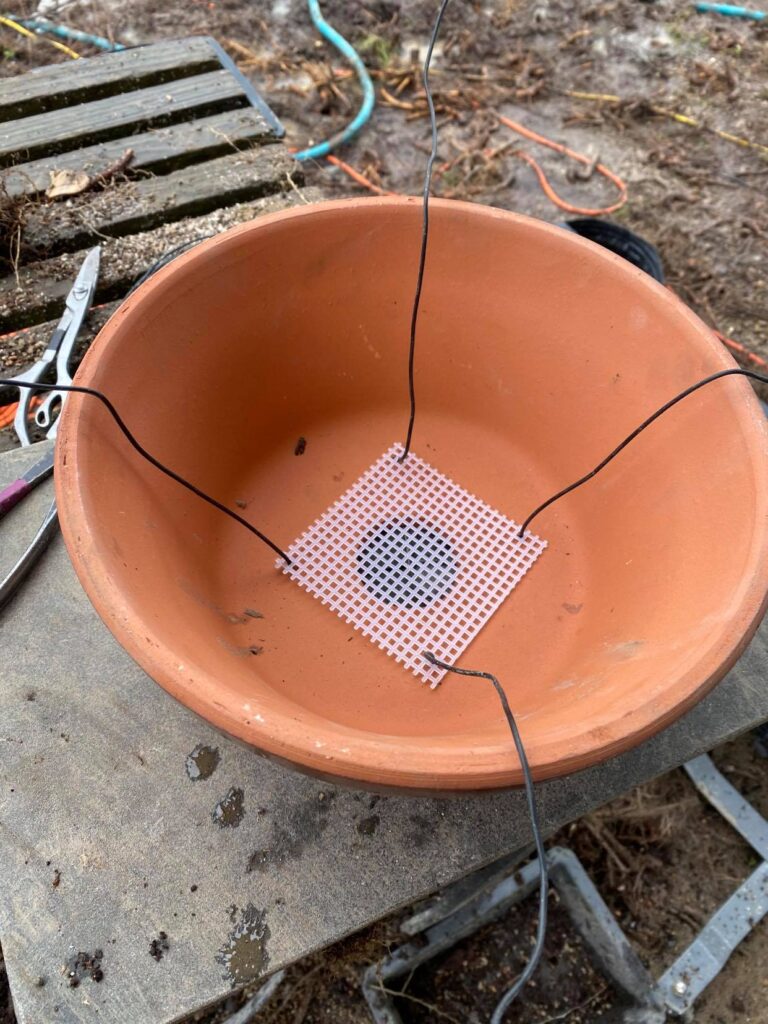
My tokoname training pot. The nerdiest thing to grow out bonsai in. They are the official grow pots of Japanese bonsai. Basically, they are the best case scenario for growing out pre-bonsai. They are low fired and breath really well. They are more stable then plastic training pots and have excellent drainage. I know it looks like a fancy terracotta pot but it is so much more! The glazed rim is the main indicator that you have a tokoname training pot and if you ever see one on sale somewhere for a reasonable price, pick it! If you take care of these pots you can grow out multiple little trees in them for years to come.
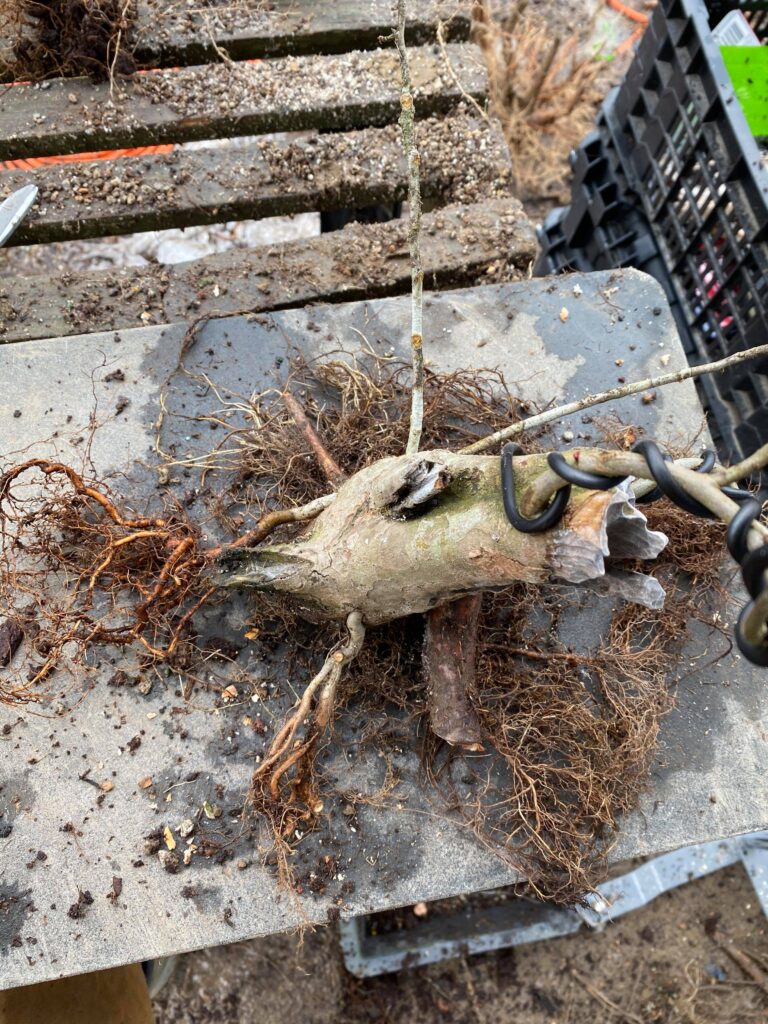
This is the tree after removing it from it’s previous pot. As you can see there are a lot of good roots but on one side. The big blank spot is actually where the front of the tree is and that is where I want to feed my first thread graft. By feeding my graft through at that point not only can I get a branch in a place I need but also a root. Here’s what I talking about.
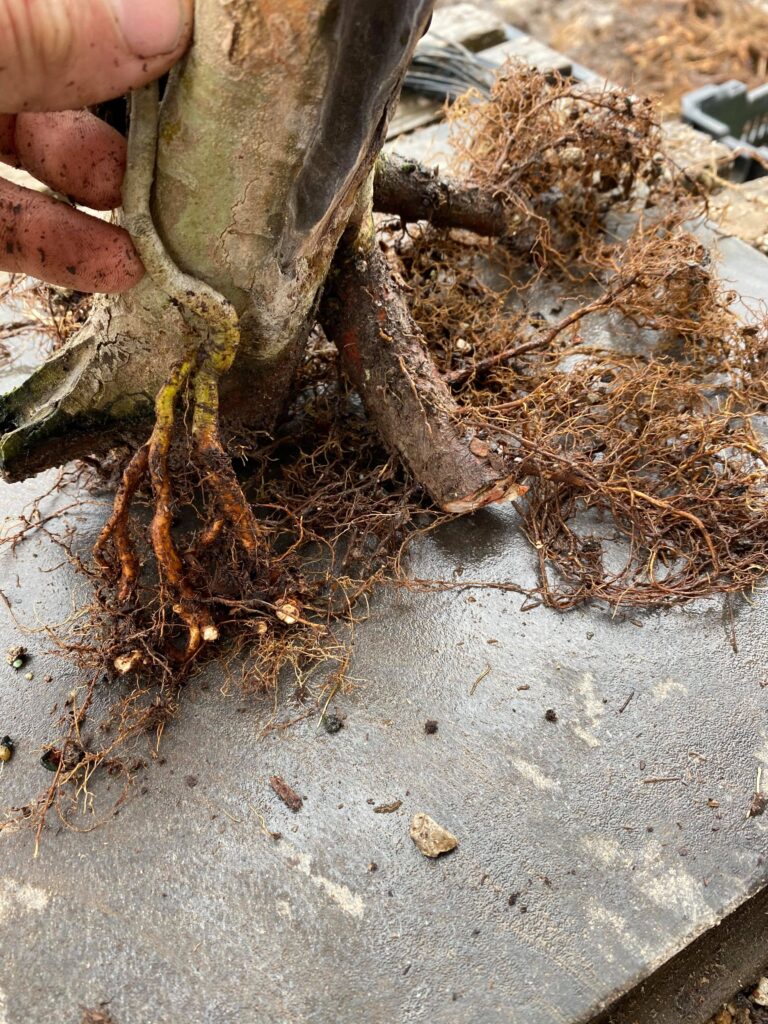
By cutting back one of the whips shown earlier I can introduce new roots into the void. Then the tree will be on its way to a nice radial root system from then on out.
Using thread grafts to double as root grafts and branches at the same time is an age old technique. Solving two issues at once plus the chance of the graft taking is much higher because the grafting material is supported by its own roots.
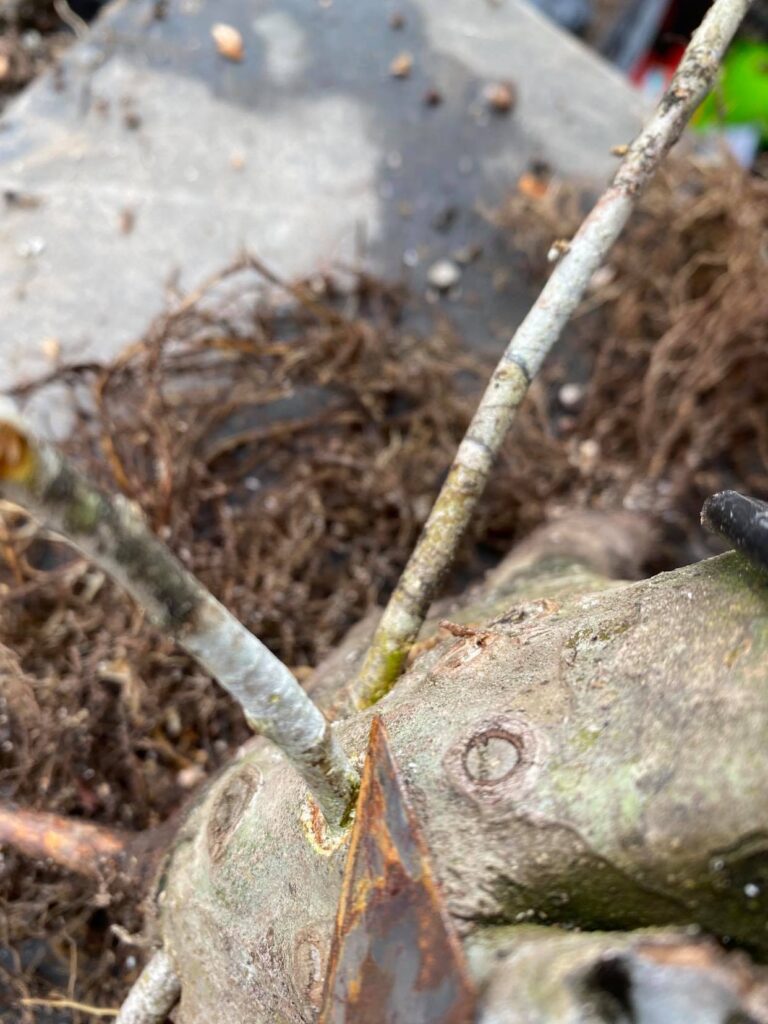
Now comes in the idea that you have to punch a hole for the whip to feed through. You have to plan out its exit because that is where the branch is going to be. So this might takes some stepping back and thinking about where exactly you want each root to began and each branch to emerge. They can only go in one direction and cannot cross each other. So it is kind of like a little puzzle.

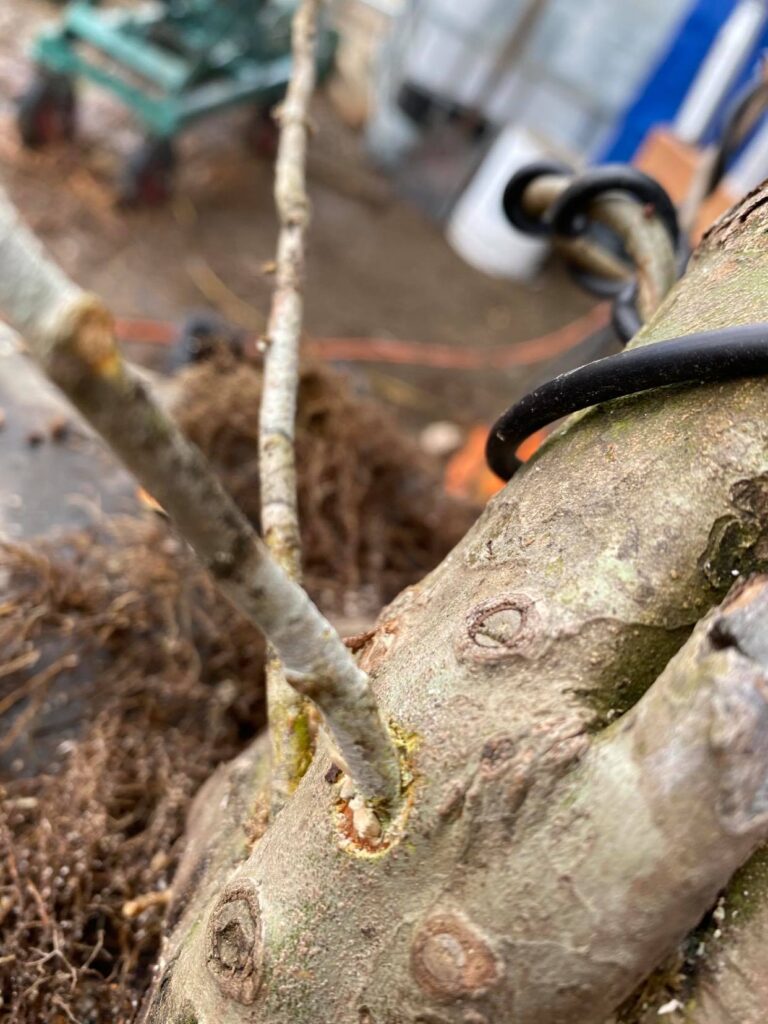
The exit is a little more rough then the entry. I made the mistake here of going the wrong way. Make sure to start where you want the branch to emerge. The blow out of the wood will effect the healing of the graft. I intend on having this tree in development for a long time and these wounds will fuse with a great amount of time. My little mistake cost me a few more grow seasons but I’m okay with it. I have plenty of other trees to work with trust me.
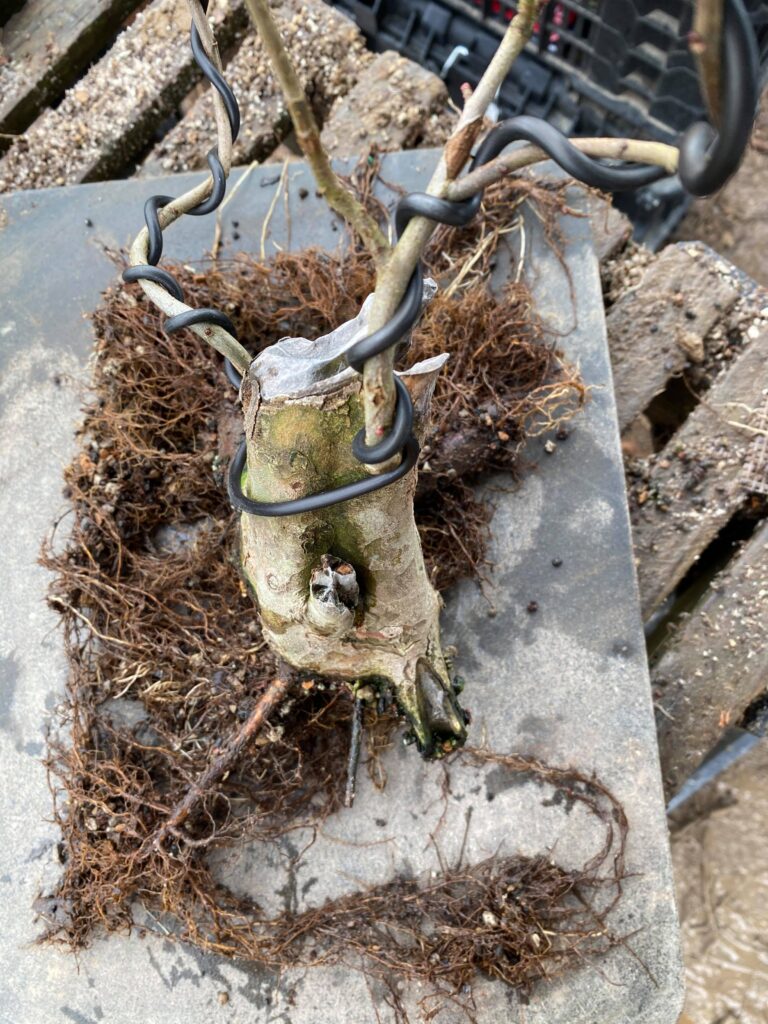
The threads going in one side and coming out the other. I went ahead and did both thread grafts. They intersect but one is underneath the other. They do not cross each other otherwise it would not work out for me. The big thick root on the left side of this picture is actually not alive. It will be carved out to appear to be a part of the root structure as time goes on. It is tricky to root graft onto parts of a tree like this mostly because of the dead tissue. There are fortunately fine roots right underneath it so there is hope that one day it can be replaced by live roots. Until then all I can do it grow out the tree and see what happens. This the fun part of bonsai! Seeing what happens next!
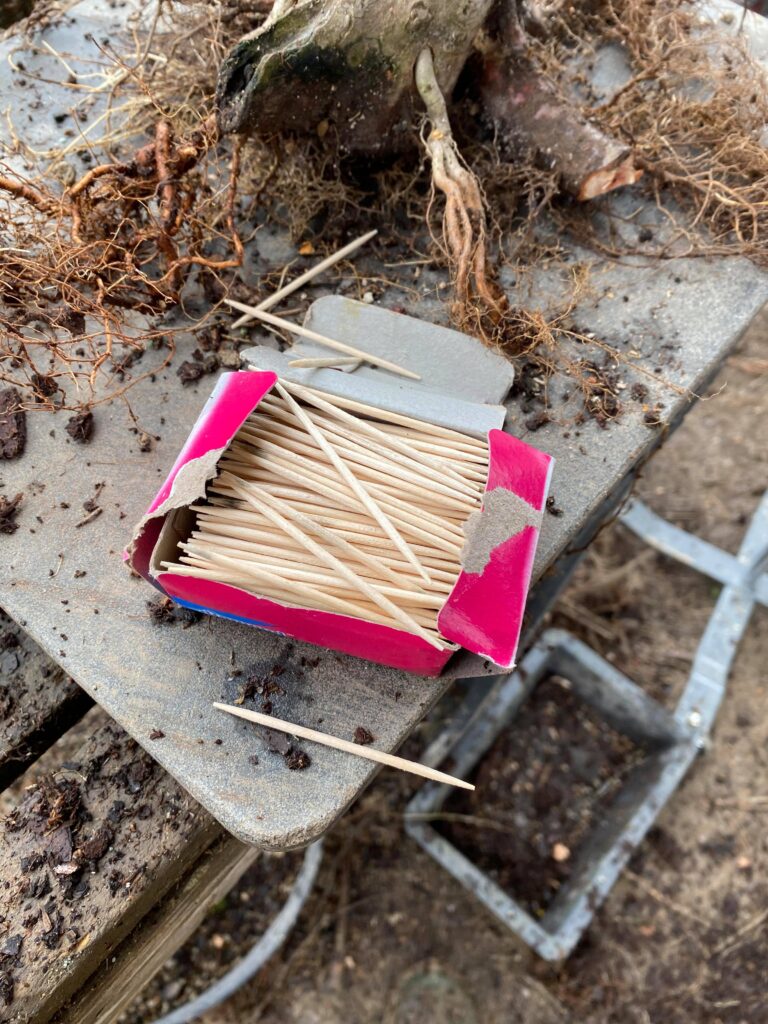
Next in my tool box, toothpicks!
Wait what.
Yeah you actually use toothpicks for this technique! So run down to the local store and grab ya a box of mini wiener serving toothpicks. I promise they are the cheapest tool you will every have in your bonsai tool box.
The idea is to jam the tooth picks into the graft entry and exit until you cannot get anymore tooth picks in there. It’s like a little game similar to the chubby bunny challenge. Here’s the key though, put the tooth picks underneath the graft and push it up into the tissue above.
You don’t have to use a rusty razor blade, a fresh clean one works just as good. Use the razor blade to scratch away the cambium layer on the graft for a stronger and quicker fusion. This will make the scar more minimal and less noticeable over time. Make sure to do this on both sides of the graft.
Best thing about threading a graft that doubles as a root graft is that you do not have to cut off the other end and heal it over. The general rule of thumb with thread grafts is that once the graft, aka your new branch, becomes bigger then the other end of the graft, the entry point, you can cut it off. In this case you won’t have to cut the end off but instead you have more roots!
Don’t mind the mess. I share this space with our grounds foreman and we make big messes in the work shed.
Pictured above of course if my tokoname training pot with mesh and tie down wires. For you who don’t know, the mesh screen keeps the soil media from falling out of the bottom of the pot.
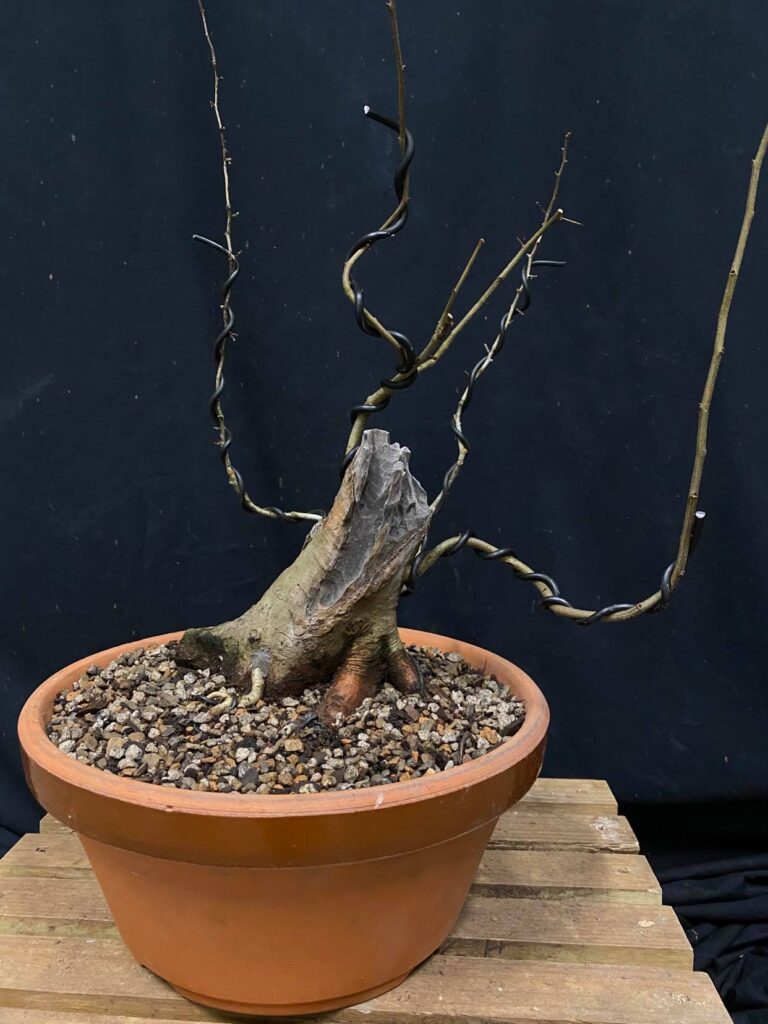
The stump tree with a few more branches and roots then it previously had. Look at how charming it looks in this tokoname pot! I’m a huge fan of it. I better be too because it will more then likely be in this pot for several years to come.
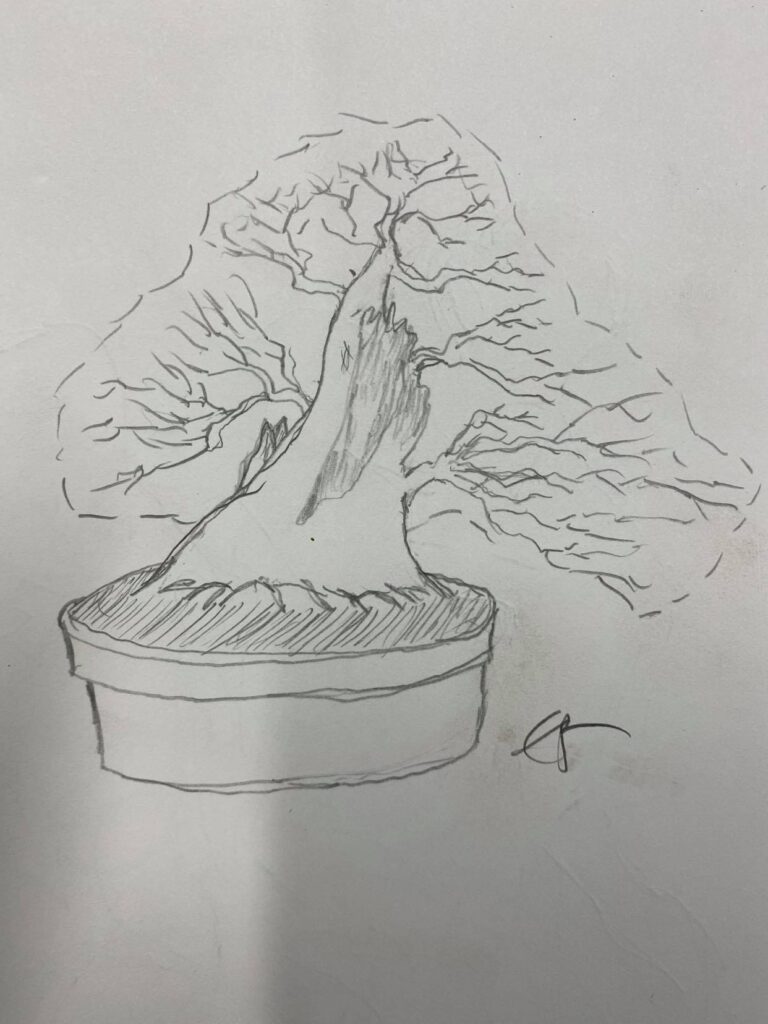
I actually drew this design up for the tree back in November. As you can see the two grafts I just put in have gotten me just that much closer to the design. I drew the radial roots without much detail due to the fact that I couldn’t see all the cool stuff happen under the soil line before I did the repotting.
So there you have it! If you are repotting any trees this year that seem to be lacking good surface roots and properly placed branches, THREAD GRAFT! Well at least when it would make sense. This technique wouldn’t work on a tall slender tree but after looking at the pictures I’m sure you can see what kind of trees can benefit from this type of work.
Cheers,
Evan